
Please read the following document to find out how to schedule a test drive, and how the diary that shows the salesperson's schedule and the schedule showing when a vehicle is available works.
View existing test drive appointments.
1. We recommend checking the availability of the vehicle by consulting the schedule on the OpenFlex home page before booking a test drive. This will help to ensure that test drives can be scheduled easily.
To do this, click on the "See my schedule" button, wich is located on the right-hand side of the screen, below the welcome message and just above today's date.

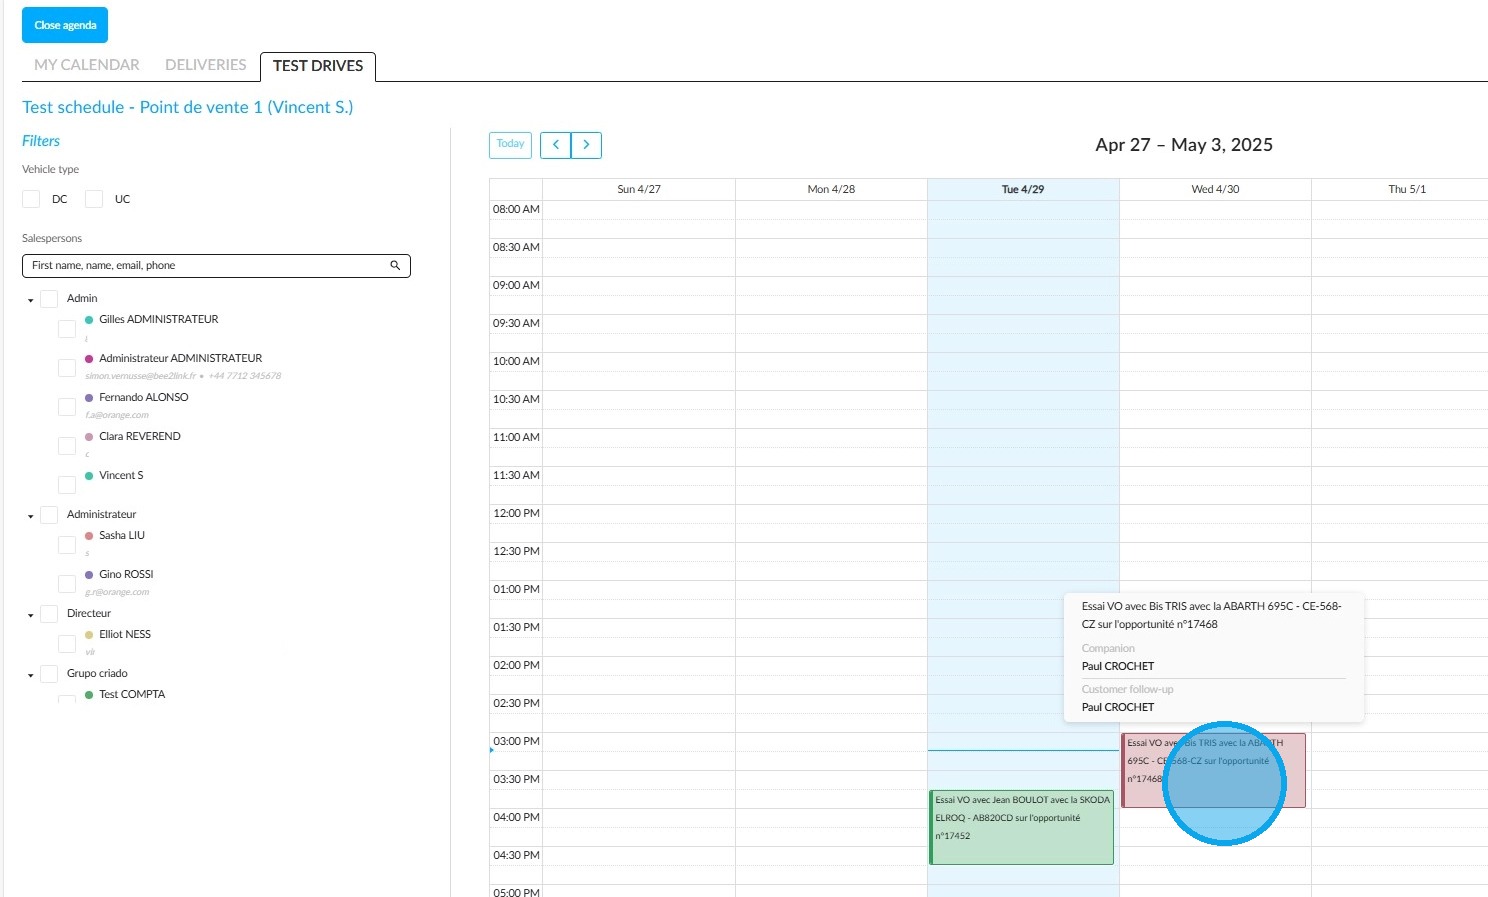
2. A screen will then appear with three tabs: 'My Calendar', 'Deliveries' and 'Test Drives'.
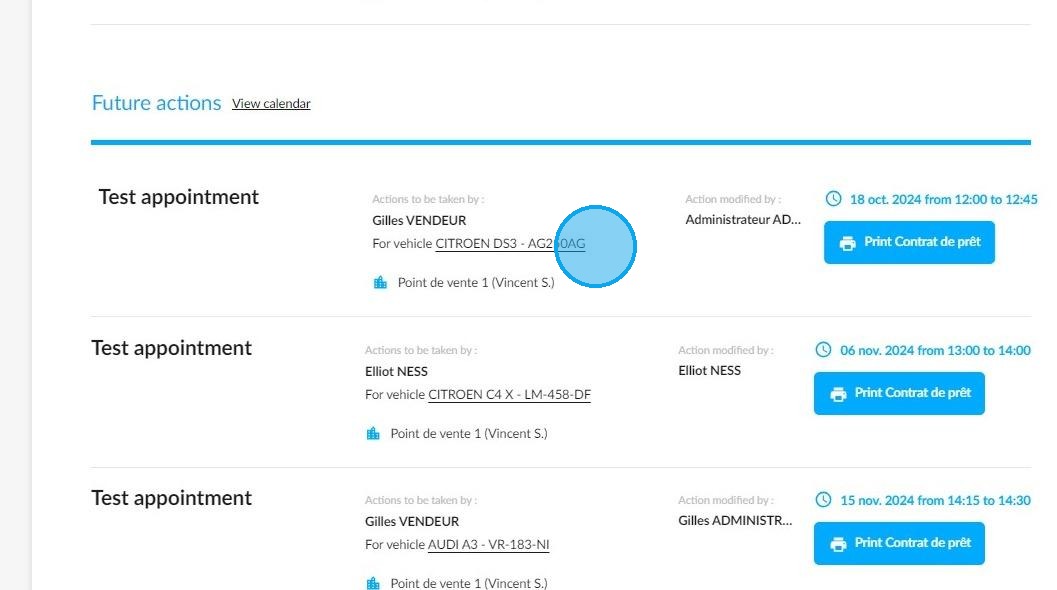
Click on the "Test Drives" tab to bring up the screen titled "Test schedule – Point of sale X". You will be able to see the appointments booked by you and your colleagues for the current week.
The name of the customer, the model tested and its registration number will appear on the schedule.
When you hover your cursor over the appointment, the name of the sales representative conducting the test drive and the name of the accompanying person will appear.
For greater clarity, filters are available in the left-hand margin to sort test drives by employee and vehicle type.
Scheduling of a test-drive
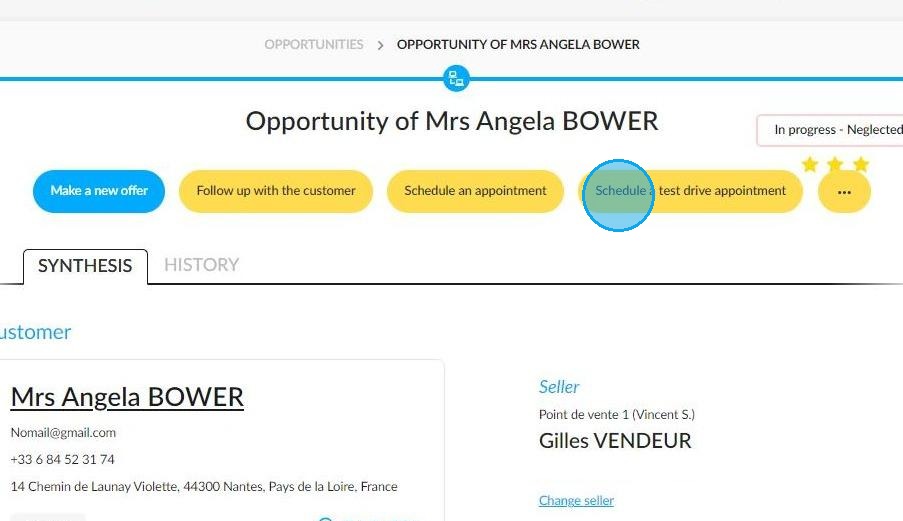
3. To schedule a a test drive appointment, go to the relevant opportunity page and then click on "Schedule a test drive appointment" at the top of the page.
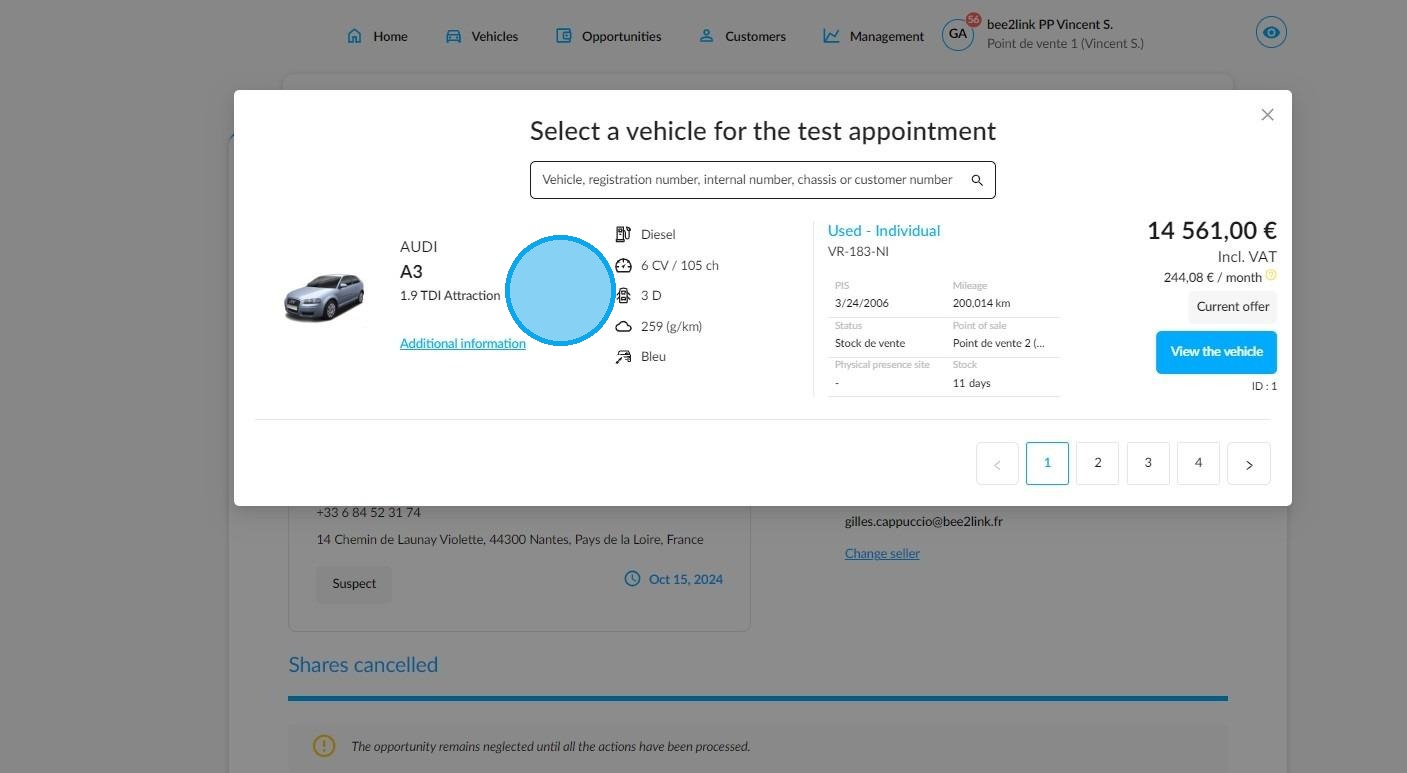
4. Choose the vehicle which interests you in the "Select a vehicle for the test appointment" window. You can scroll through the cars with the arrows located at the bottom of the window.
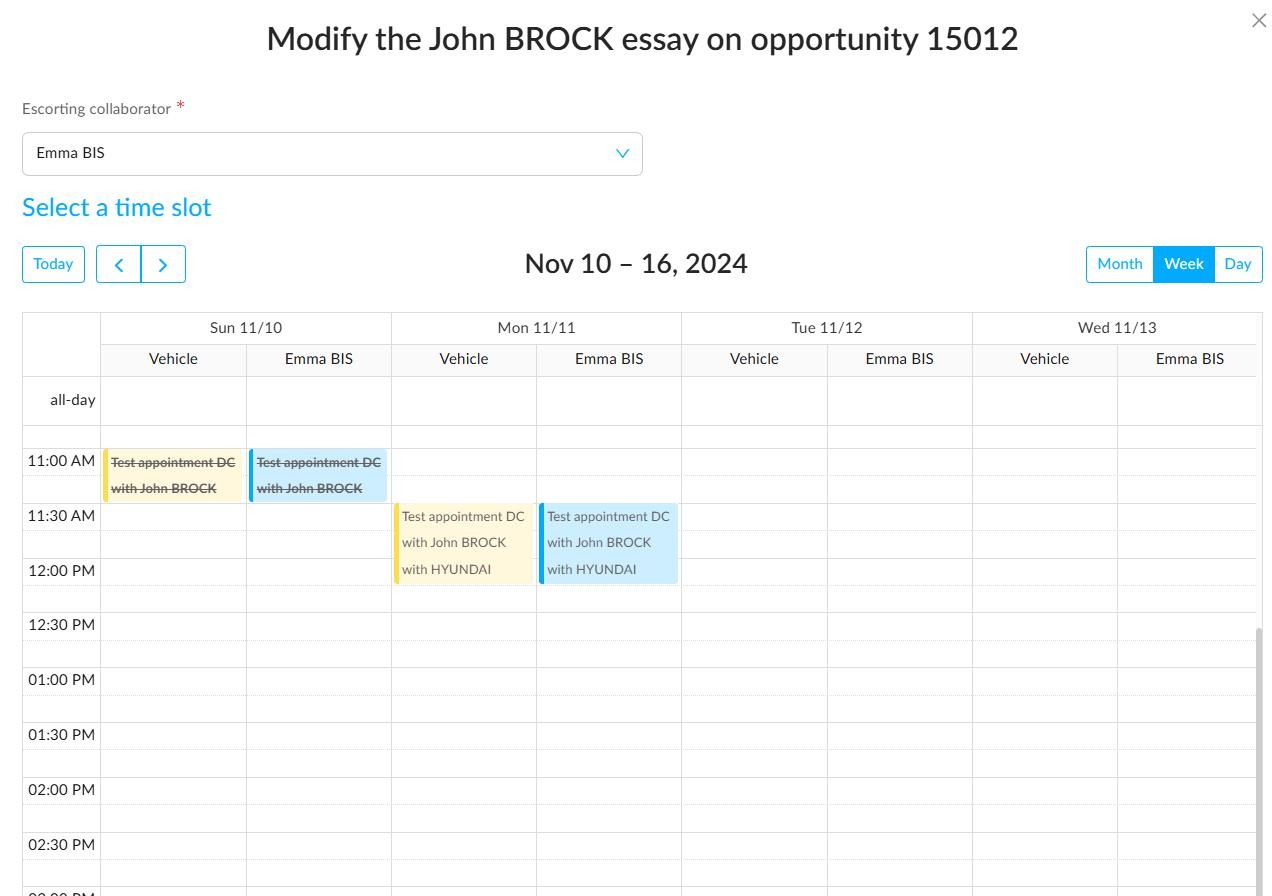
5. A new window will appear, titled 'Schedule the test drive of XXX on opportunity XXX'.
When scheduling a test drive appointment, the calendar in the "Select a time slot" section shows vehicle availability in the left-hand column and sales assistant availability in the right-hand column.
You can change the accompanying person by scrolling down the drop-down menu at the top of the window.
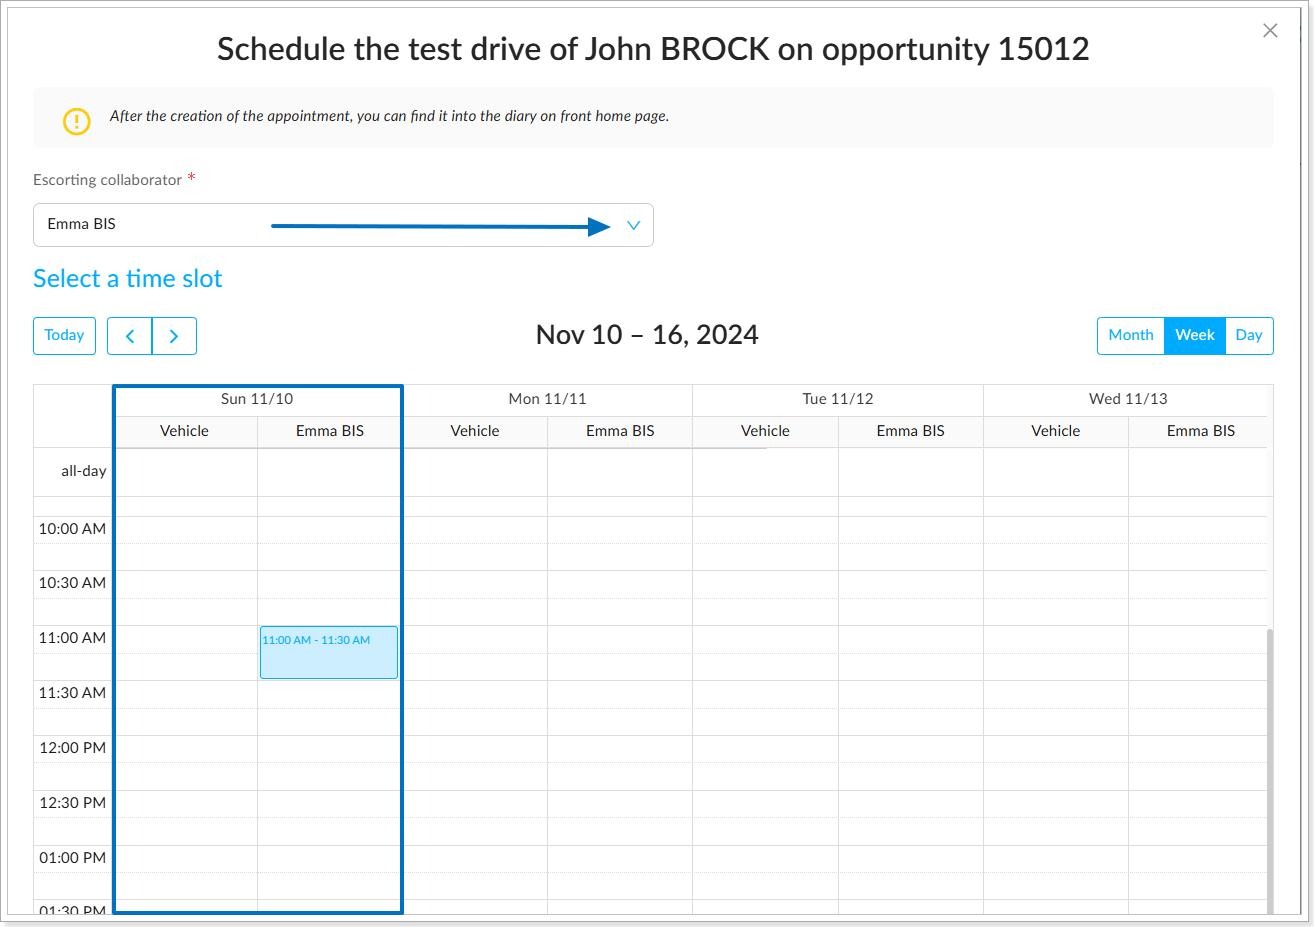
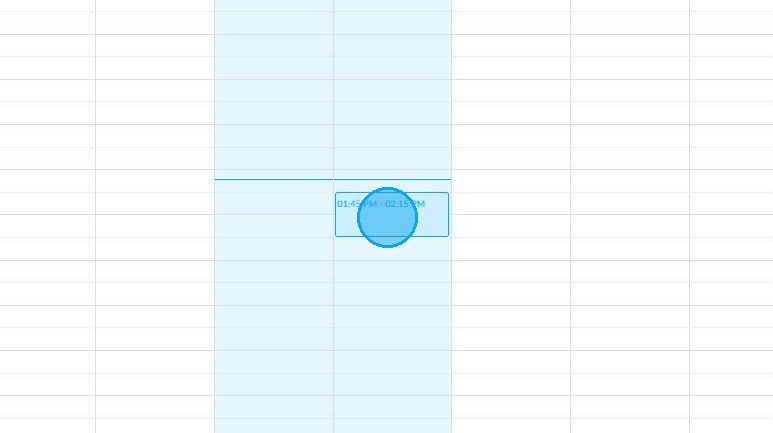
6. Afterwards, select the date and the hour which suit you on the calendar.
Each day has two columns. Click on the right-hand side to choose the appropriate time slot.
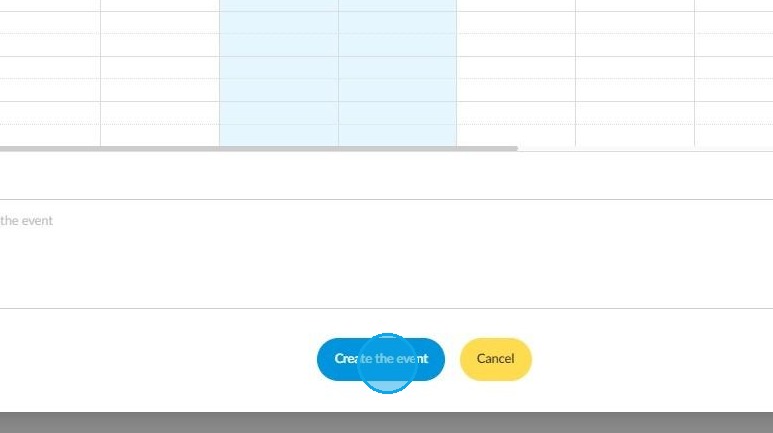
7. Click on the "Create the event" button at the bottom of the screen.
You will receive a notification in the top right-hand corner of the screen, as well as an email, to confirm the test drive appointment.
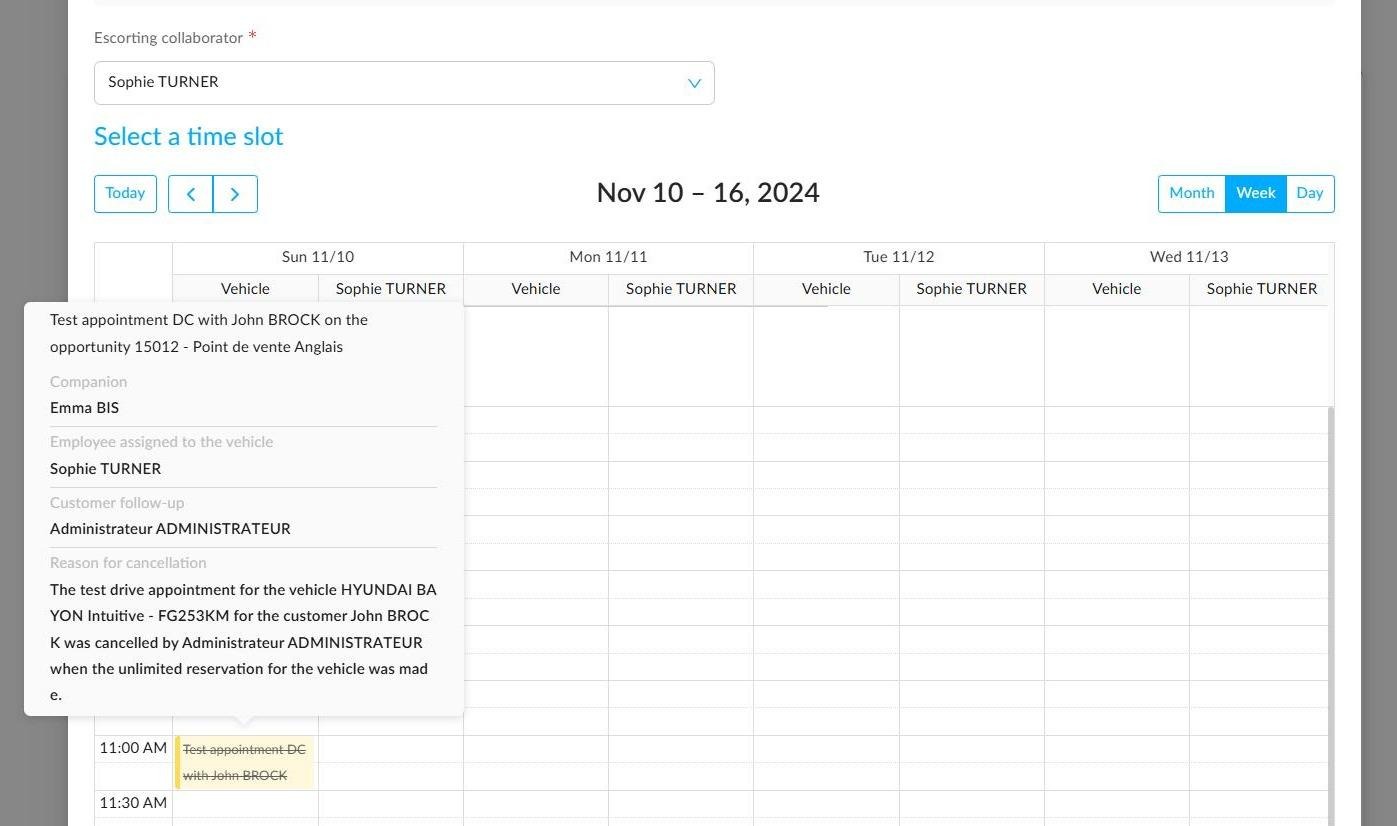
8. A wide range of information is displayed by hovering the cursor over an appointment:
-The name of the salesperson who will accompany the customer during the test drive.
-The name of the employee using the vehicle (if no employee is assigned to this vehicle, no data will be displayed).
-The name of the sales assistant responsible for the customer follow-up.
-In the event of cancellation of the appointment, the reason for cancellation and the name of the person who carried out the action that led to cancellation (unlimited reservation, 48-hour reservation, sale, etc.) will be indicated.
9. This data can also be viewed when consulting the column that shows an employee's timetable.
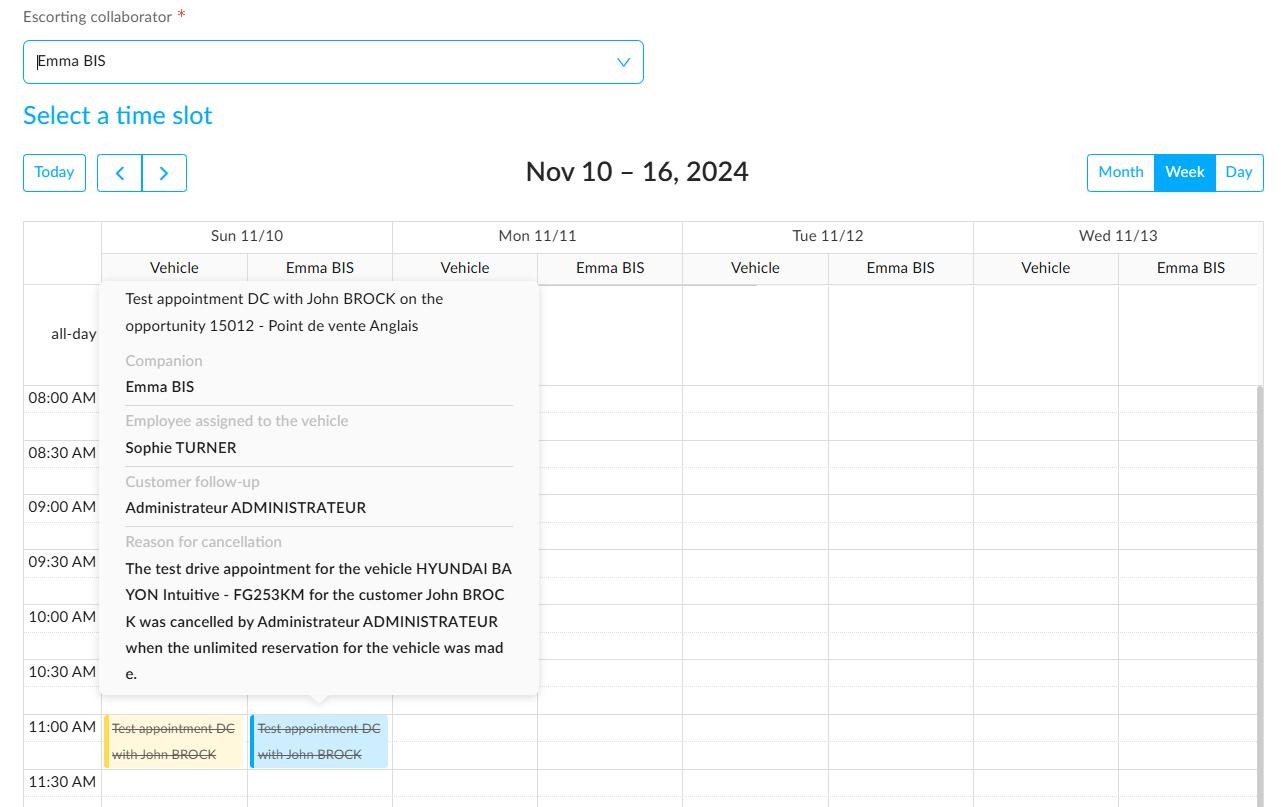
It is not possible to schedule a test drive of a vehicle at the same time for two different employees, and it is not feasible to assign the follow-up of two test drive appointments to a sales assistant at the same time.
Modification of a test drive.
10. Once a test drive appointment has been scheduled, you can change the modalities at any time. To do so, go to the relevant opportunity.
Once you have accessed the page titled "Opportunity of Mr/Ms XXX", please proceed to the "Future actions" section. Then, select the test drive appointment that is of interest to you.
Opportunities / Opportunity of Mr-Ms. XXX
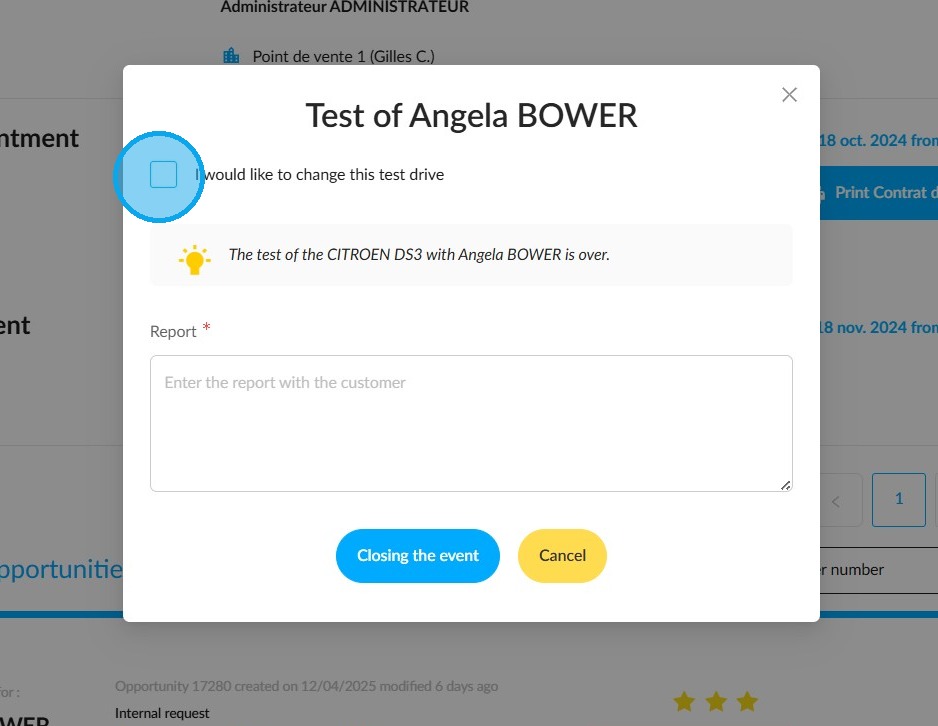
11. Please select the option 'I would like to change this test appointment' on the 'Test of XXX' window that is displayed.
12. You will see the same display as described on steps 5 and 6, when you created the appointment. Use your mouse to select a new time slot.
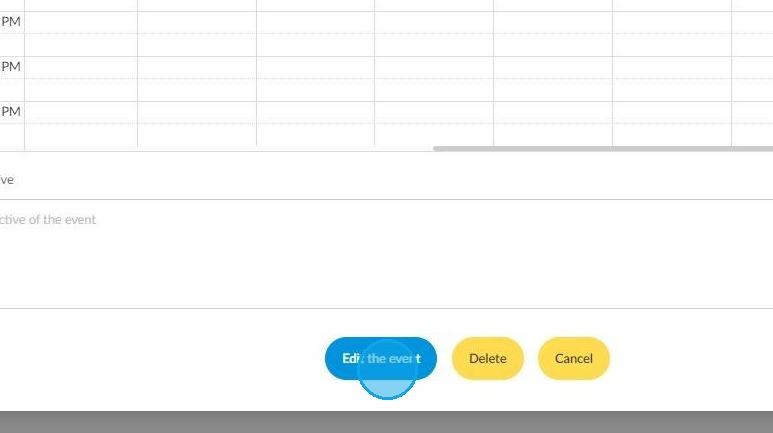
13. Please click on the "Edit the event" button, which you will find at the bottom of the page. You will then see a notification at the top right of your screen.
Comments
0 comments
Article is closed for comments.