
Find out how to add an advertiser contract in the publication settings and how to set up a publication mode with an advertiser.
Prerequisite: you need administrator rights.
The advertiser must contact our support team in advance to notify us of the implementation of a new advertising contract.
How to access the settings ?
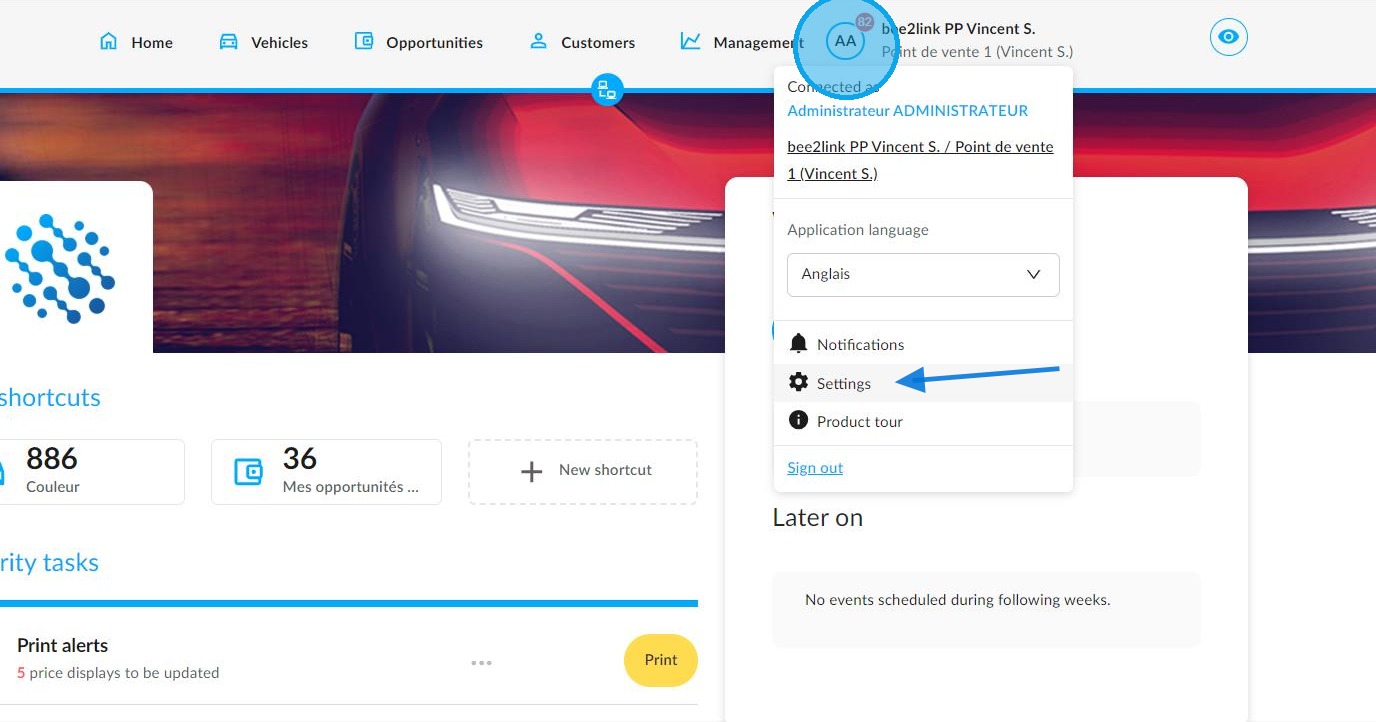
From the OpenFlex home page, click on your initials to access the ‘Settings’ of the platform modules:
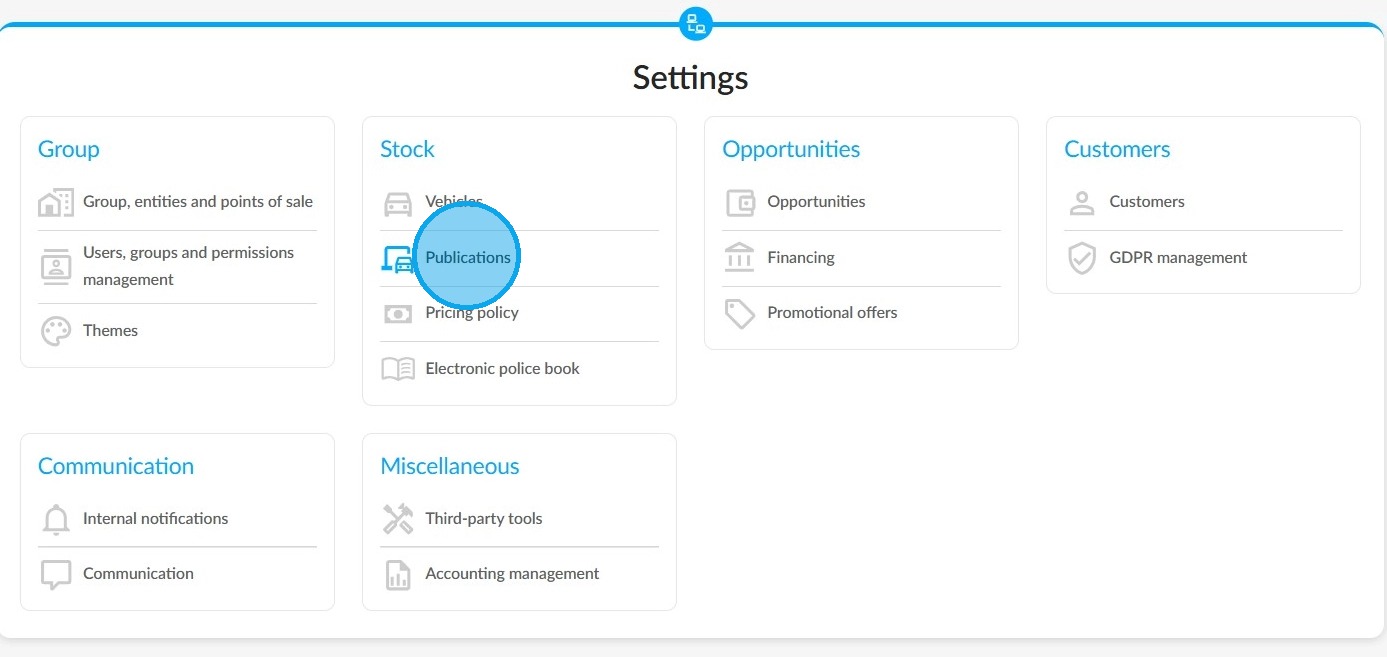
To add an advertiser contract, click on the "Publications" tab in the section dedicated to stock management:
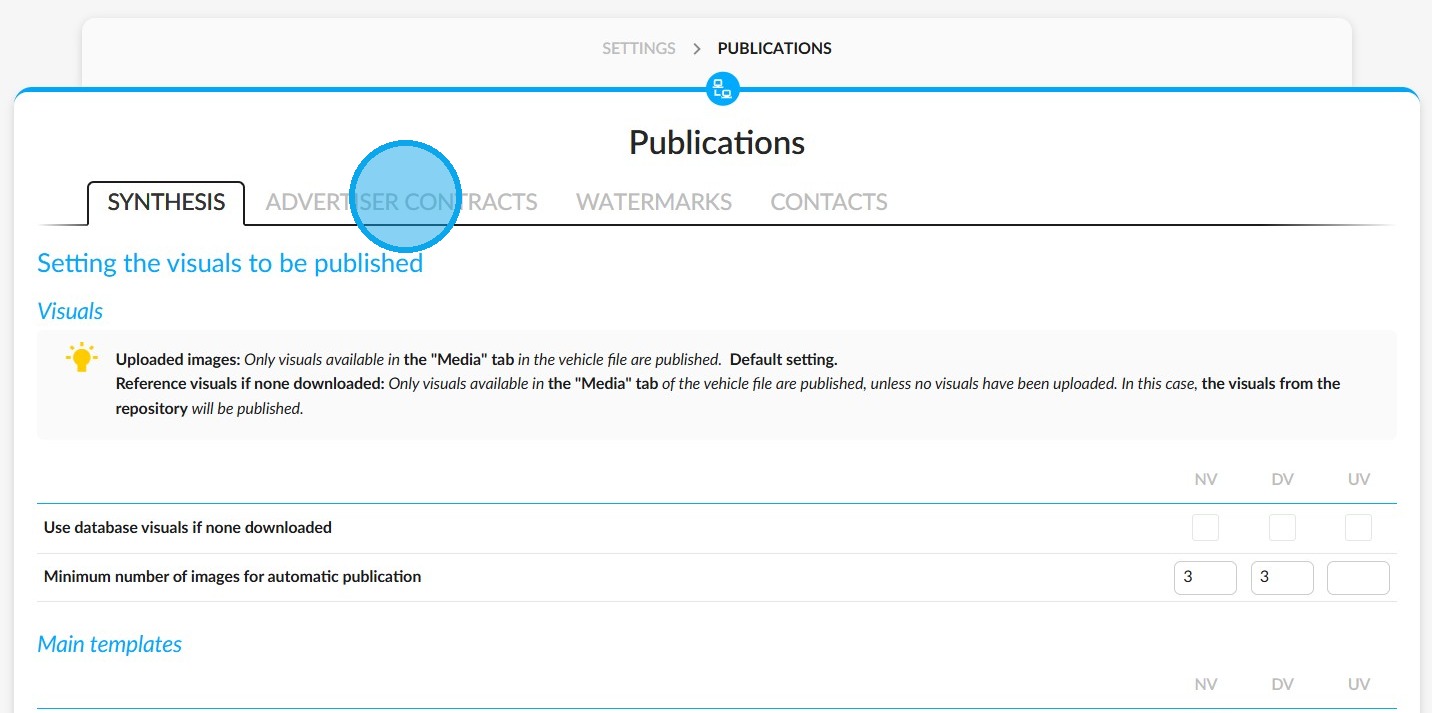
Then click "Advertiser contracts" at the top of the page.
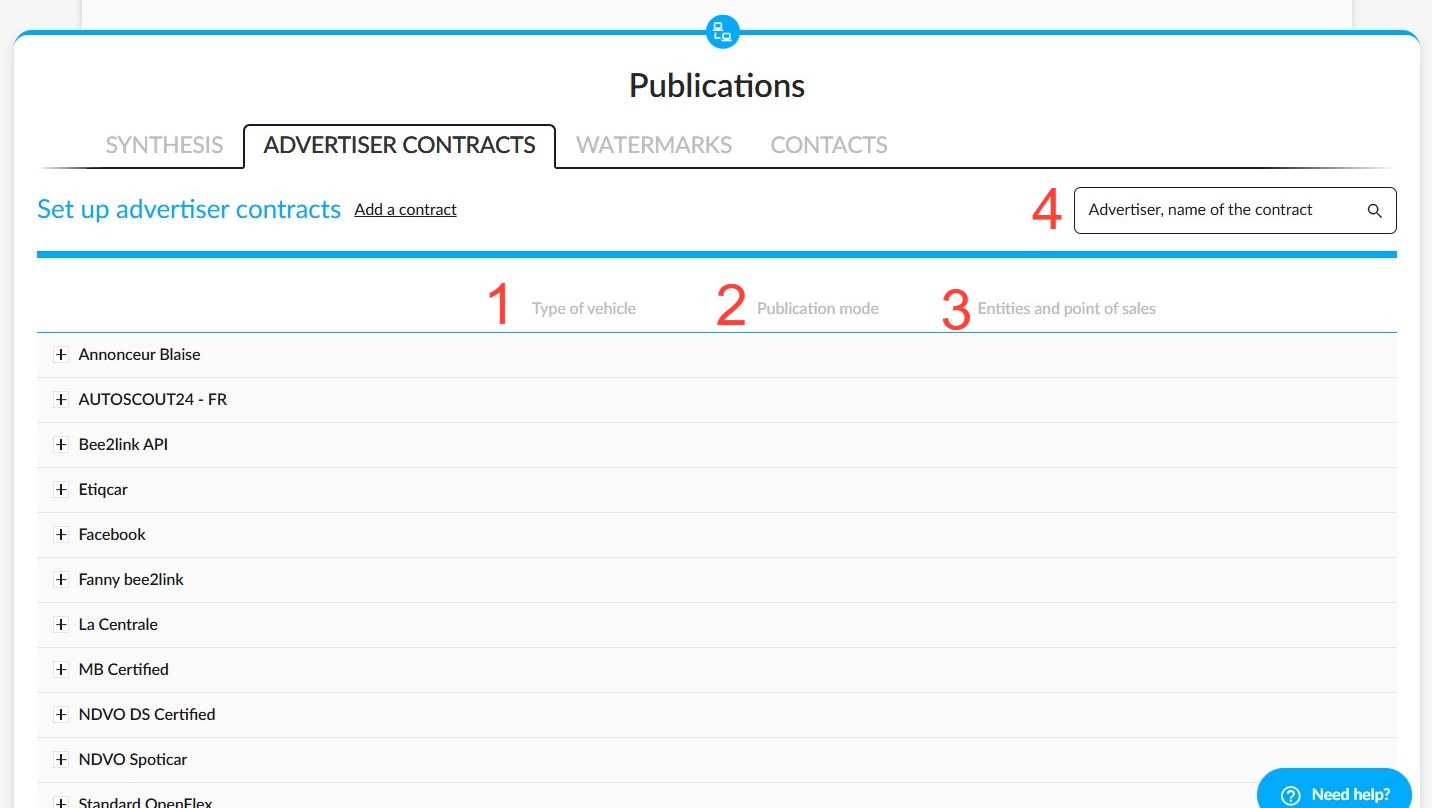
Menu overview:
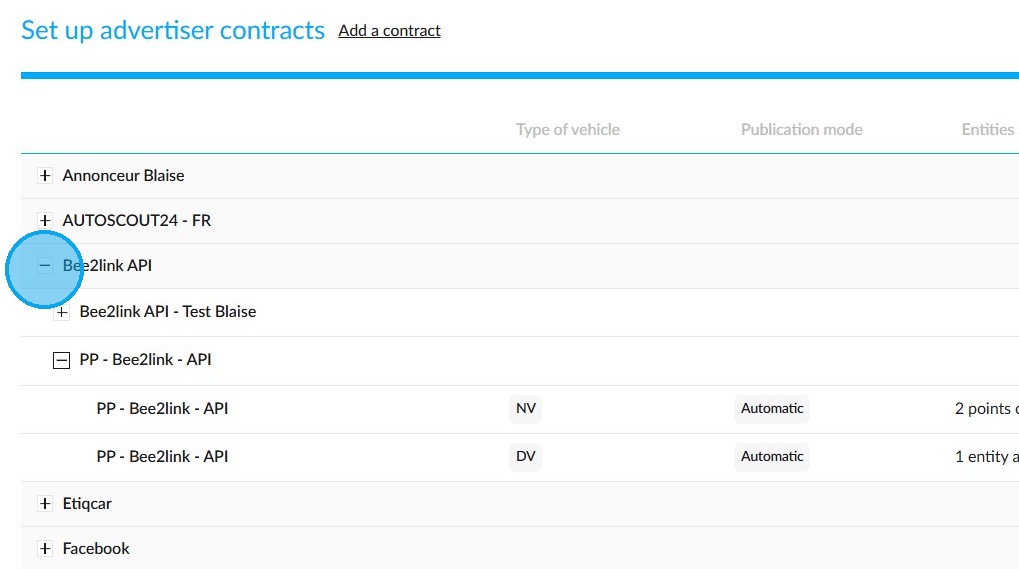
Existing advertiser contracts will be displayed in a summary table showing:
-The type of vehicle published and the destination 1.
-The publication mode selected 2.
-The number of entities and points of sale assigned to an advertiser contract 3.
- You can also search for an advertiser or contract quickly by entering their name in the provided field 4.
Expand the menus using the "+" buttons and collapse them using the "-" buttons. The contract details will then be displayed.
Before expanding them, the first line corresponds to the advertiser's name (Bee2link API in the example below).
The following lines are dedicated to the various contracts signed with this advertiser.
By expanding the contract name, you will access its configuration, which includes the vehicle type, publication mode, and number of points of sale and entities.
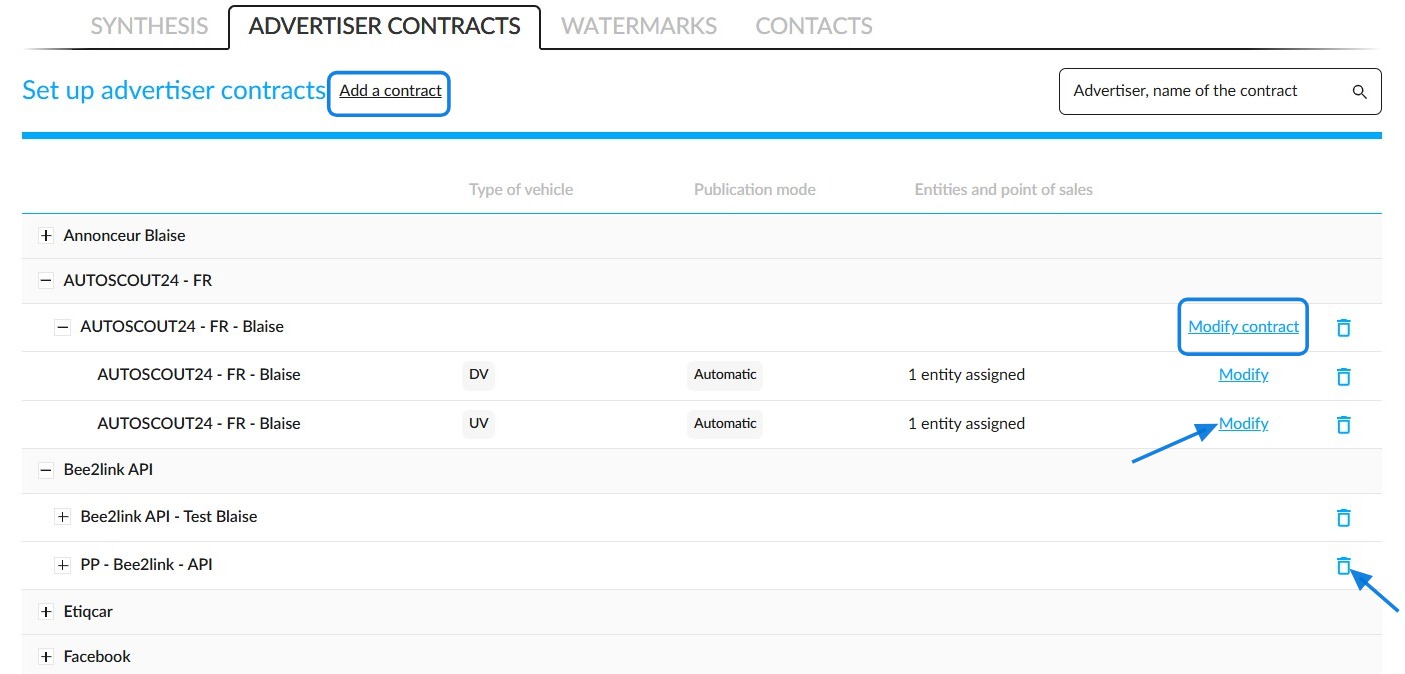
Several buttons are available to manage these contracts:
-The ‘Add a contract’ button allows you to add a new advertiser contract.
-The "Modify contract" button only appears if no specific configuration has been defined for an entity or point of sale.
-If a specific configuration exists, the 'Modify' button will enable you to specify which entities and points of sale the vehicles will be sent from for publication on this advertiser's website, and the type of vehicle to be published.
-Another button allows you to delete an advertiser's contract.
How do I set up a new advertiser contract?
To add a new advertiser contract, click on the relevant button.
A new window will appear. In this window you will be asked to:
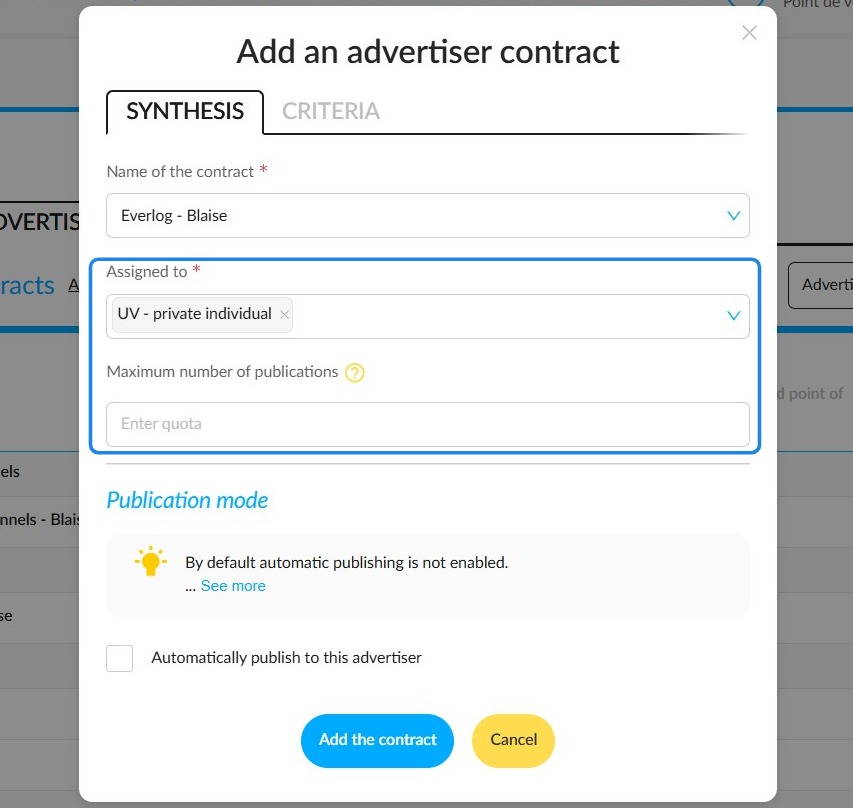
-Select the name of the new contract with the advertiser who will be running the adverts for your vehicles.
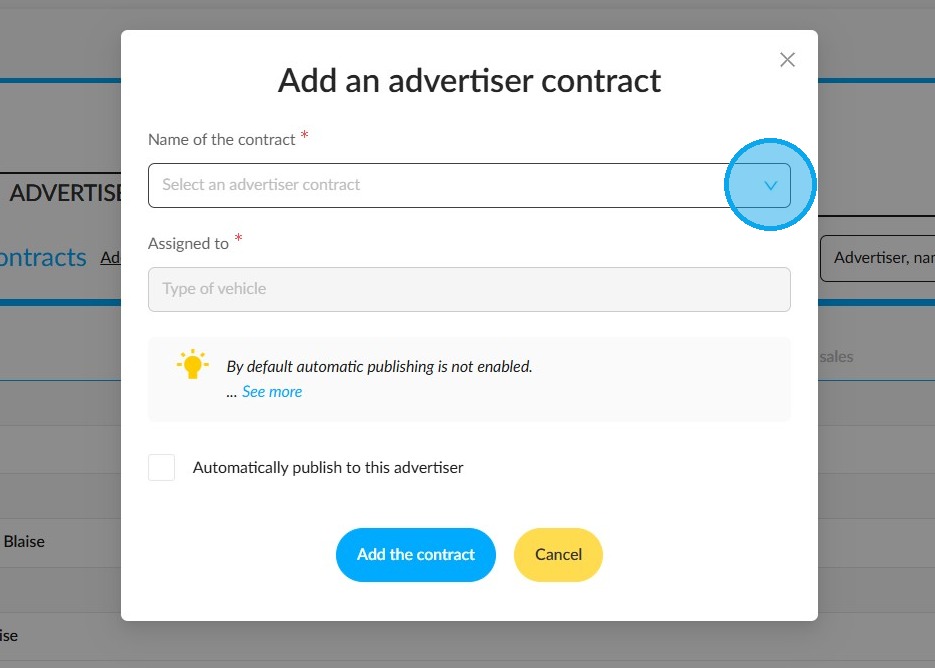
-Specify the types of vehicle that you would like to be published.
-If necessary, use the 'Maximum number of publications' field to limit the number of vehicles published by a particular advertiser.
Go to the ‘Criteria’ tab to set the publication requirements for this advertiser:
- The number of photos required,
- The mileage,
- The price.
Tick the ‘Extend to all group points of sale’ box to apply these requirements across the board.
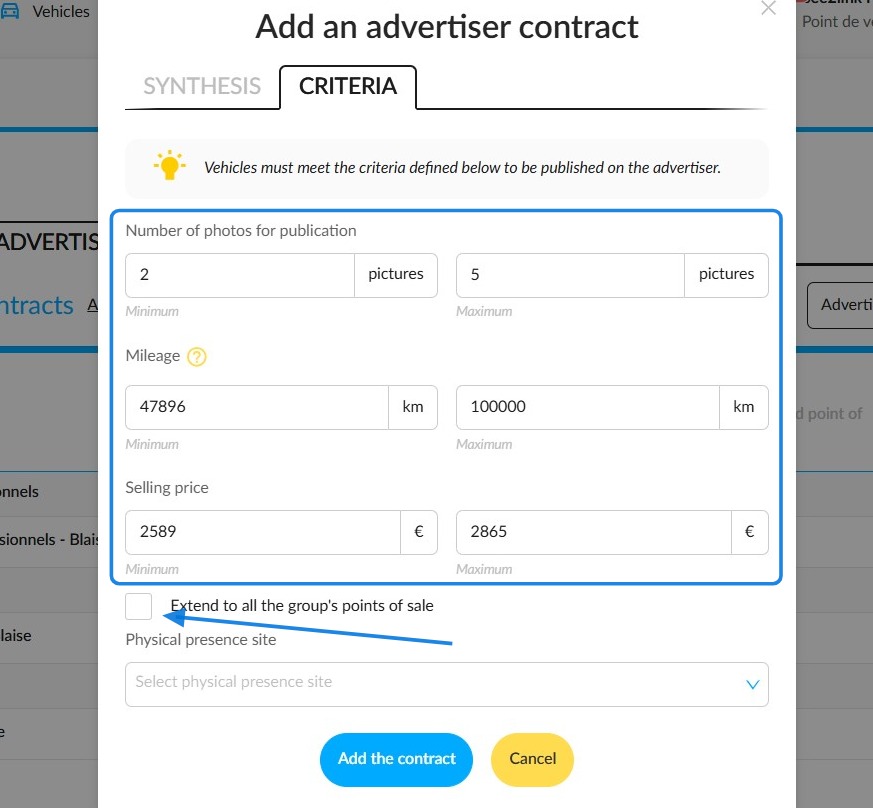
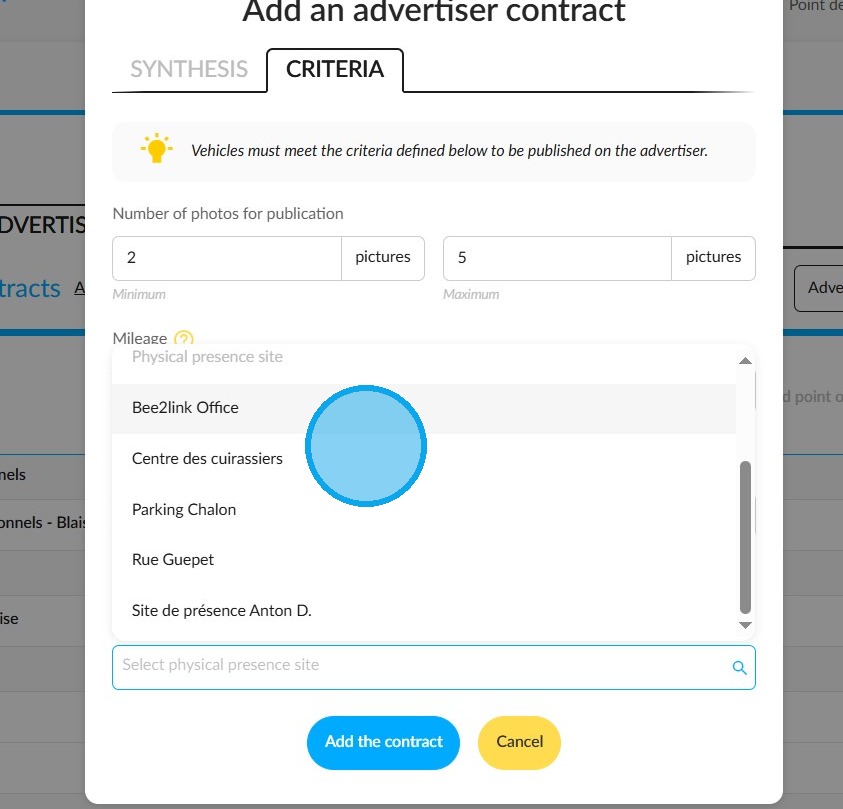
You can also select the relevant points of sale, either from across the entire group or by limiting the selection to your entity.
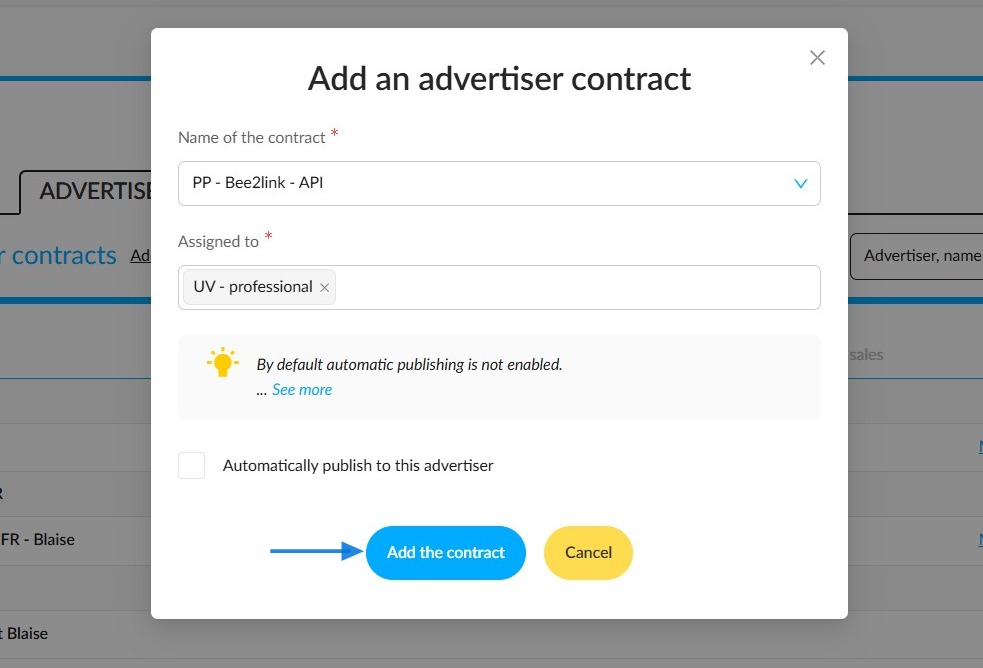
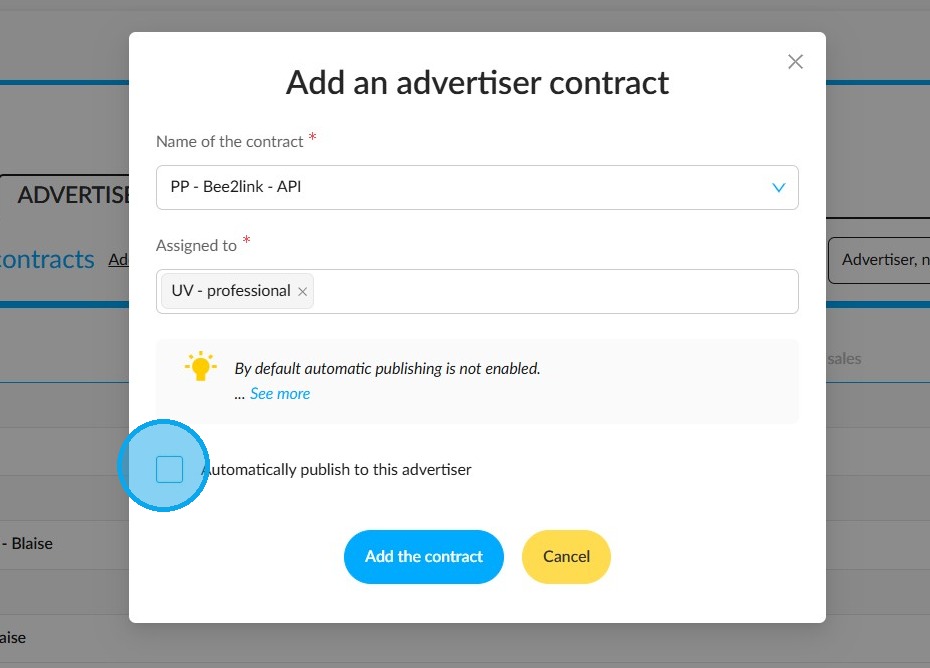
Manual publishing:
Two publishing modes are available for this advertiser: automatic and manual.
By default, publication is done manually.
To publish your vehicle ads manually, leave the settings as shown below and click on the "Add the contract" button.
If you choose to publish your vehicles manually with an advertiser, you will need to select this advertiser from each vehicle detail page.
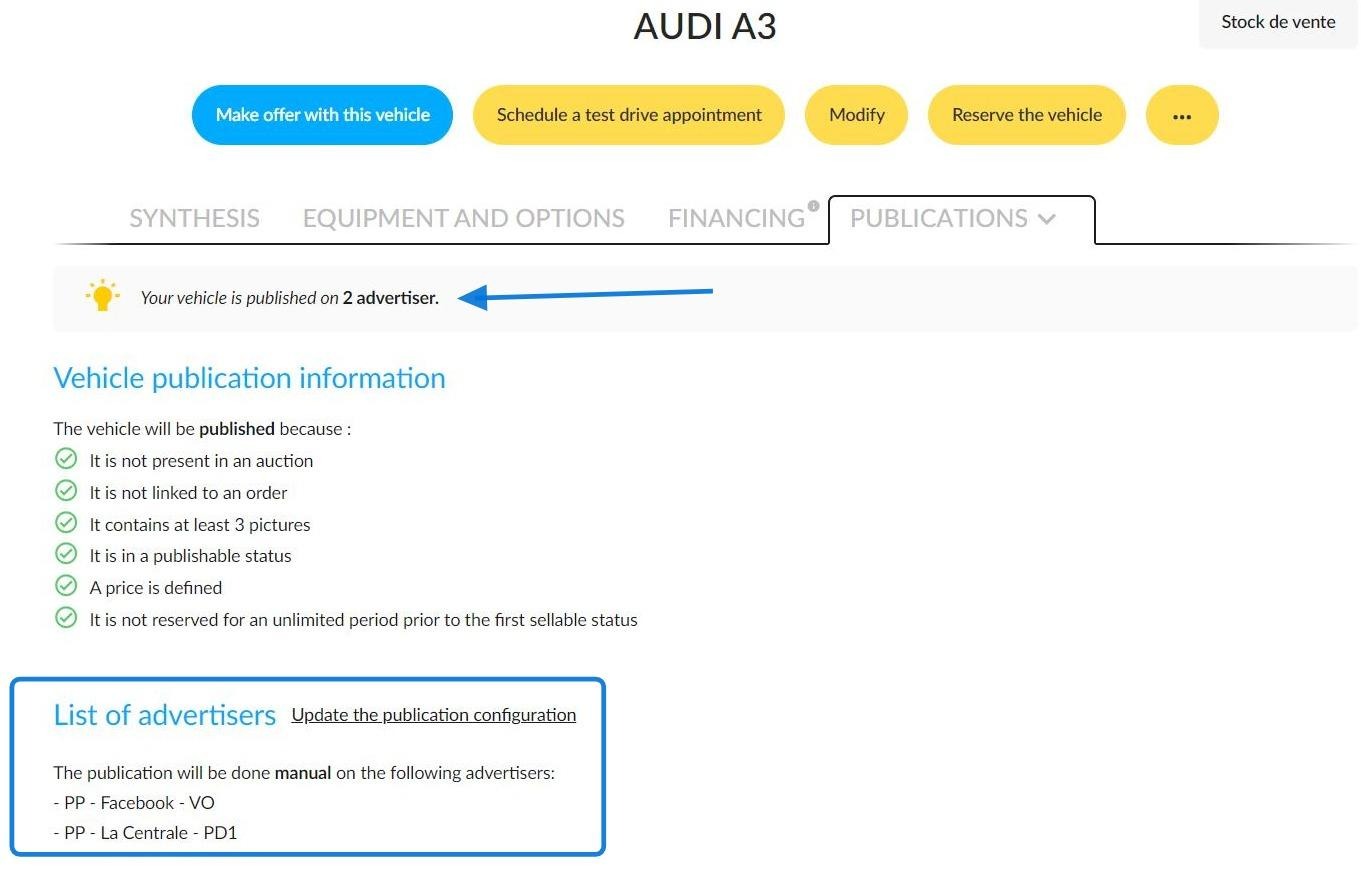
Example:
Selecting two advertisers to publish a used vehicle manually:
Vehicles/Synthesis/Publications/List of advertisers/Advertisers where I would like to publish my vehicle:
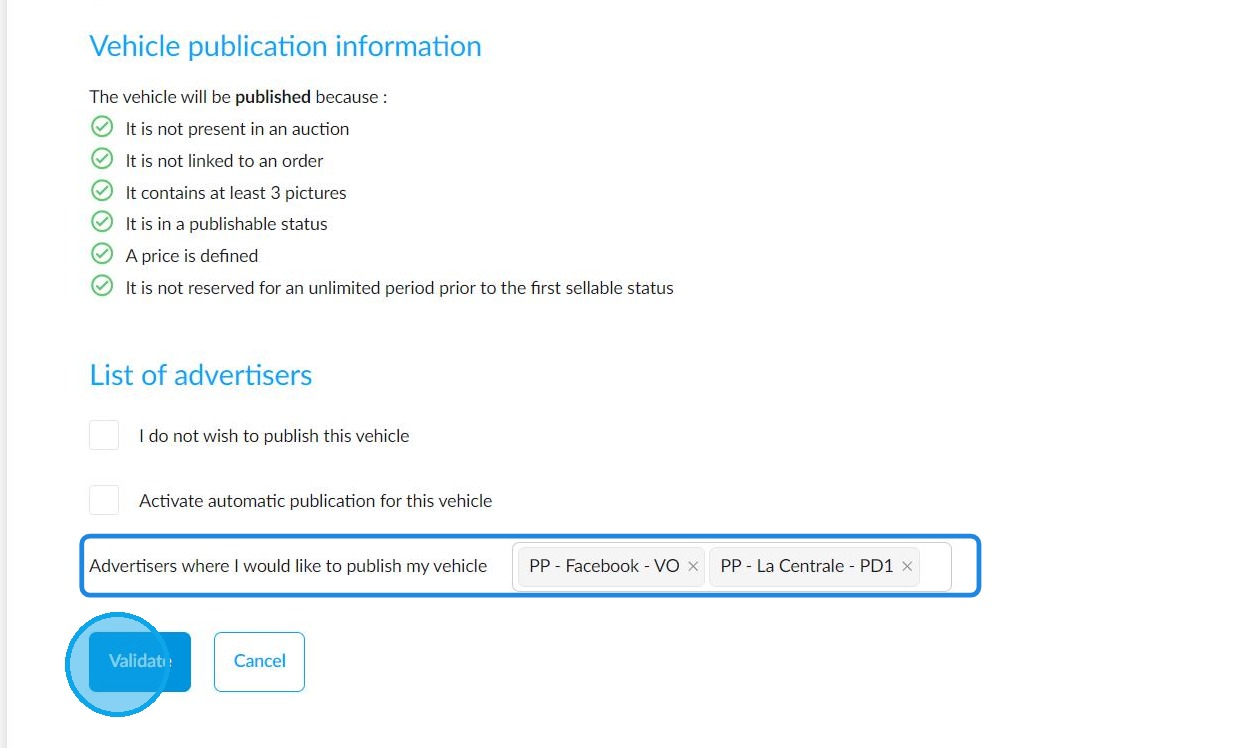
It has been confirmed that this UV will be published manually for two advertisers.
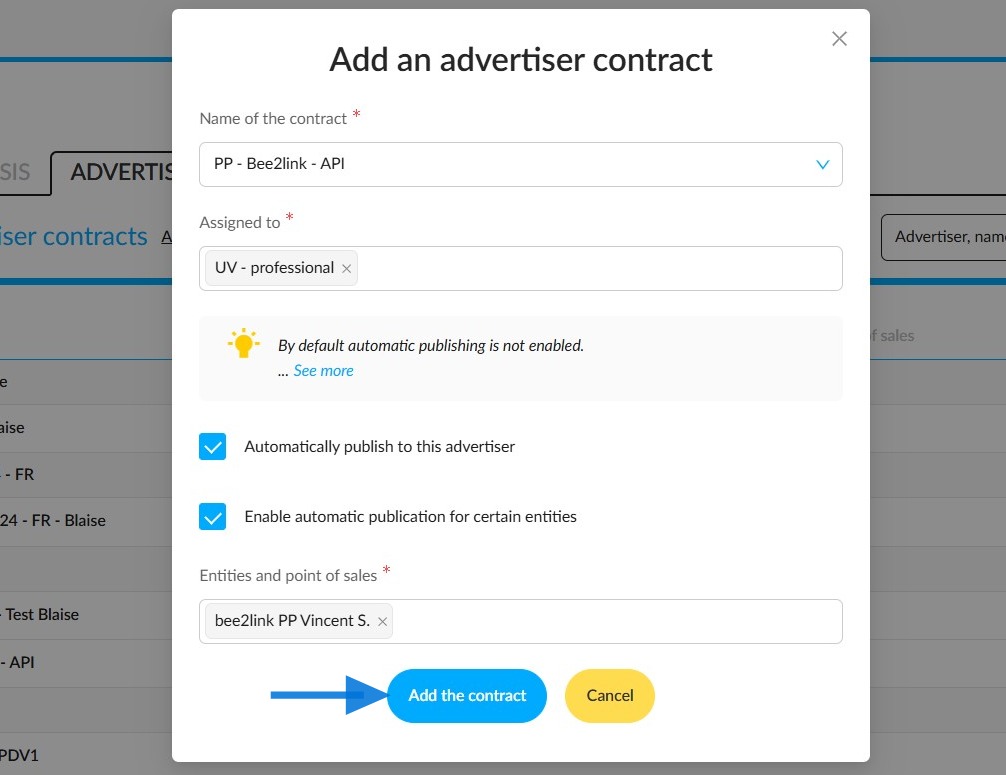
Automatic publishing
If you would like your vehicle ads to be published automatically, tick the box labelled 'Automatically publish to this advertiser'.
This will enable automatic publishing for your entire group.
However, you can refine this setting by activating it for specific entities and points of sale.
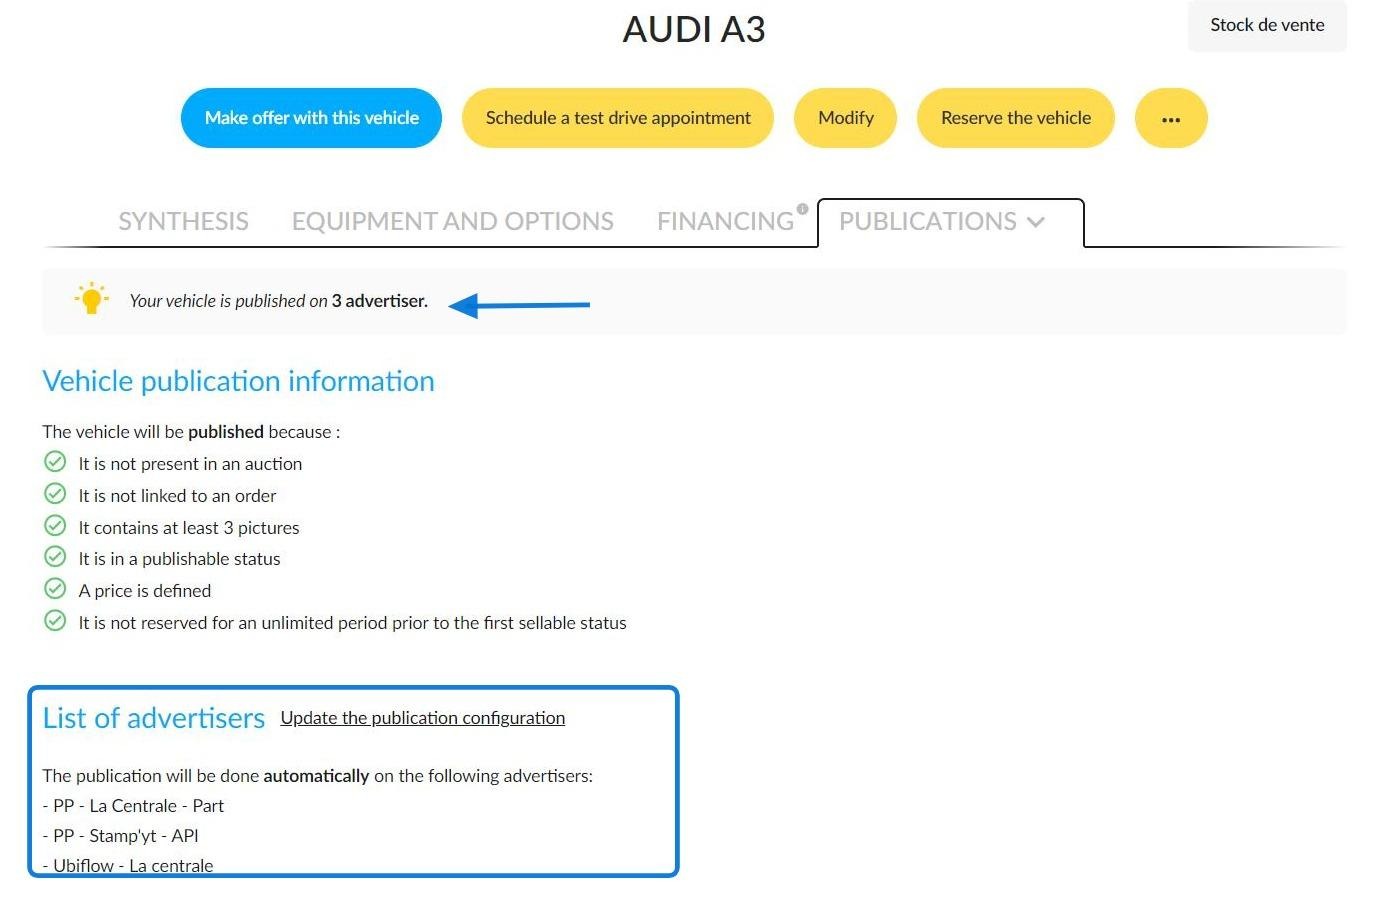
This means that all vehicles that meet the publication criteria you set up in the settings will be sent automatically to this advertiser's site.
FAQ 015: how to set the criteria required to publish your vehicles automatically?
Example of a used vehicle automatically published to three advertisers.
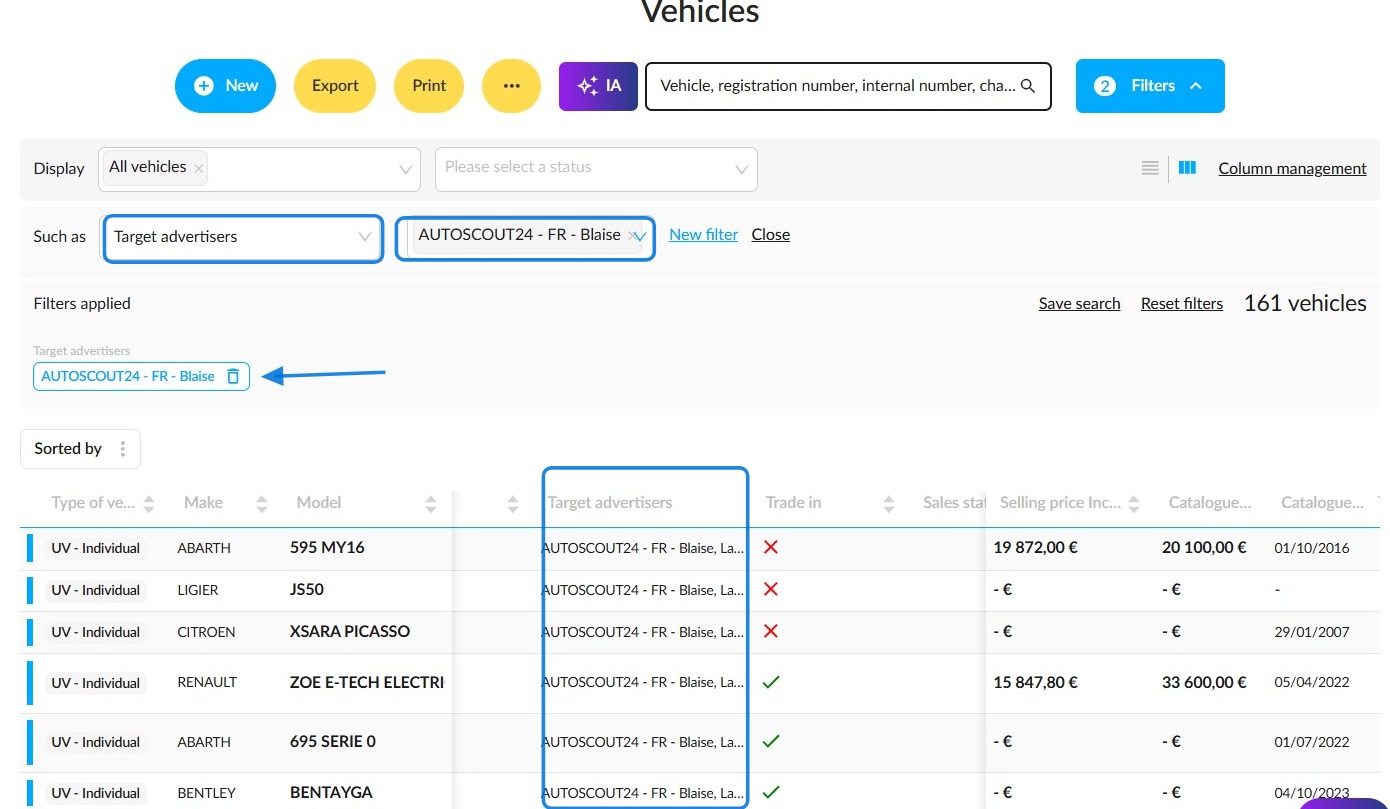
Filtering by target advertisers:
You can easily find out which advertisers the vehicles will be sent to by consulting the "Target advertisers" column in the table showing stock.
This is displayed by default, so there is no need to add it.
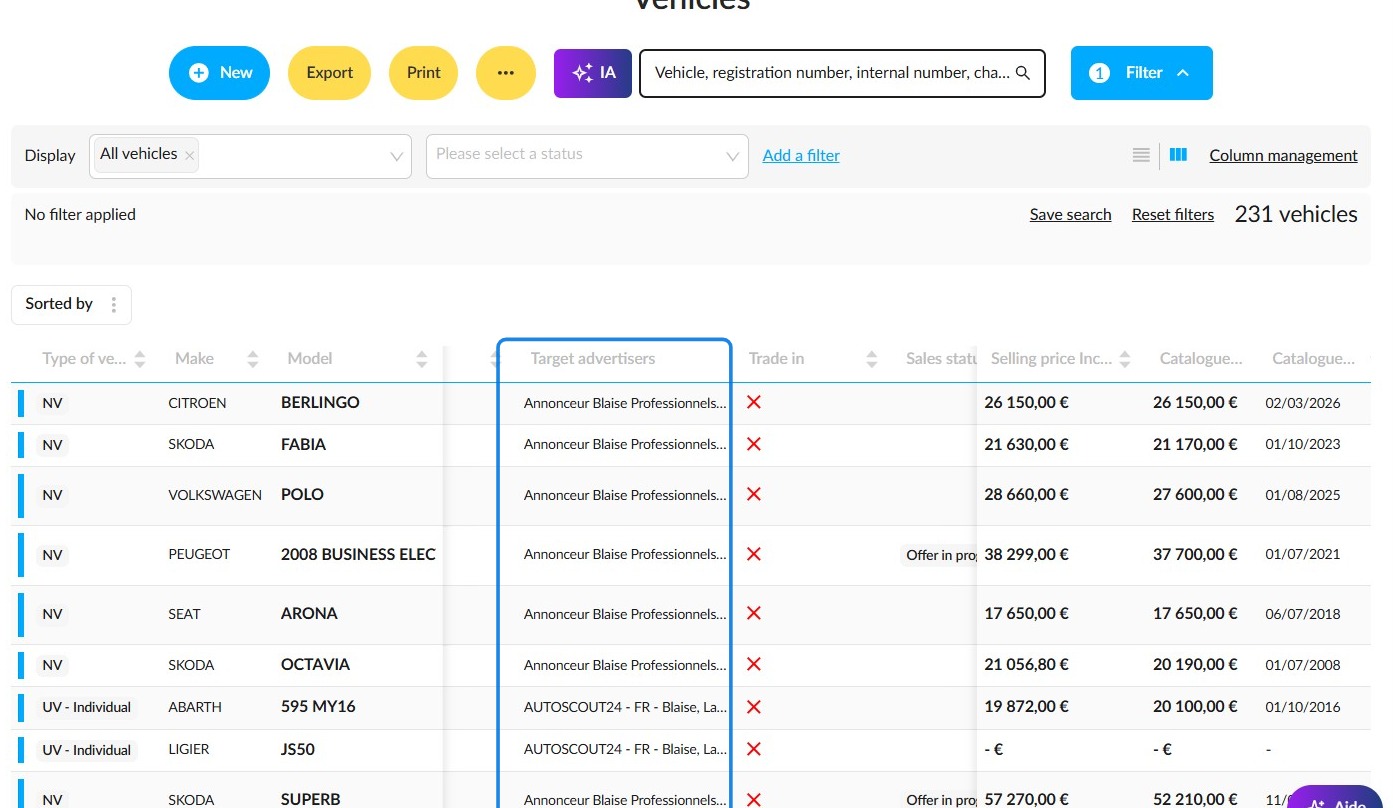
This information can also be filtered. A new filter called "Target advertisers" is available in the "Sales cycle" section.
Adding it will enable you to sort the displayed results by looking for the advertisers responsible for publishing DVs/UVs:
Comments
0 comments
Article is closed for comments.