
This guide explains how to create and assign tags to vehicle types (new, used or demonstration). It also provides information on modifying this allocation.
Requirements: OpenFlex administration rights are required in order to create tags. In otder to create or edit tags on a group scale, you also need to be in a holding environment.
Path to access tags
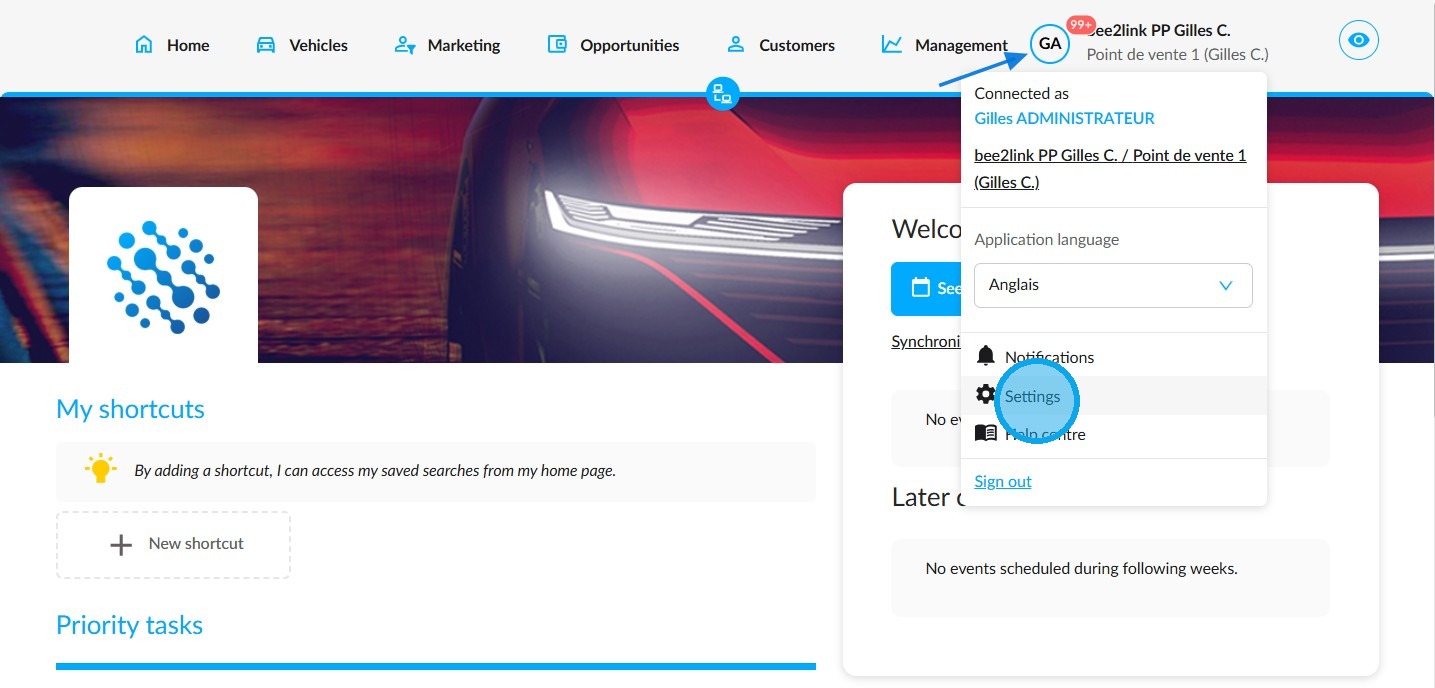
1. Navigate to the OpenFlex home page. Click on your initials in the top right corner of the screen, then on the settings.
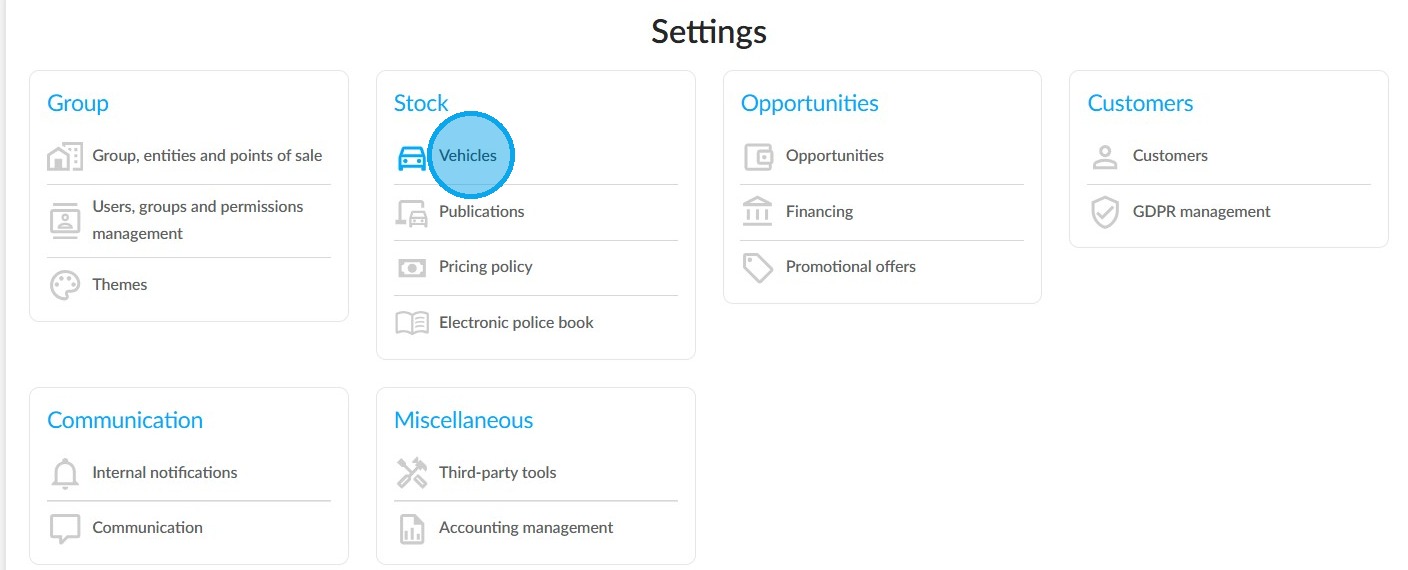
2. Enter the Vehicles' configuration in the "Stock" section.
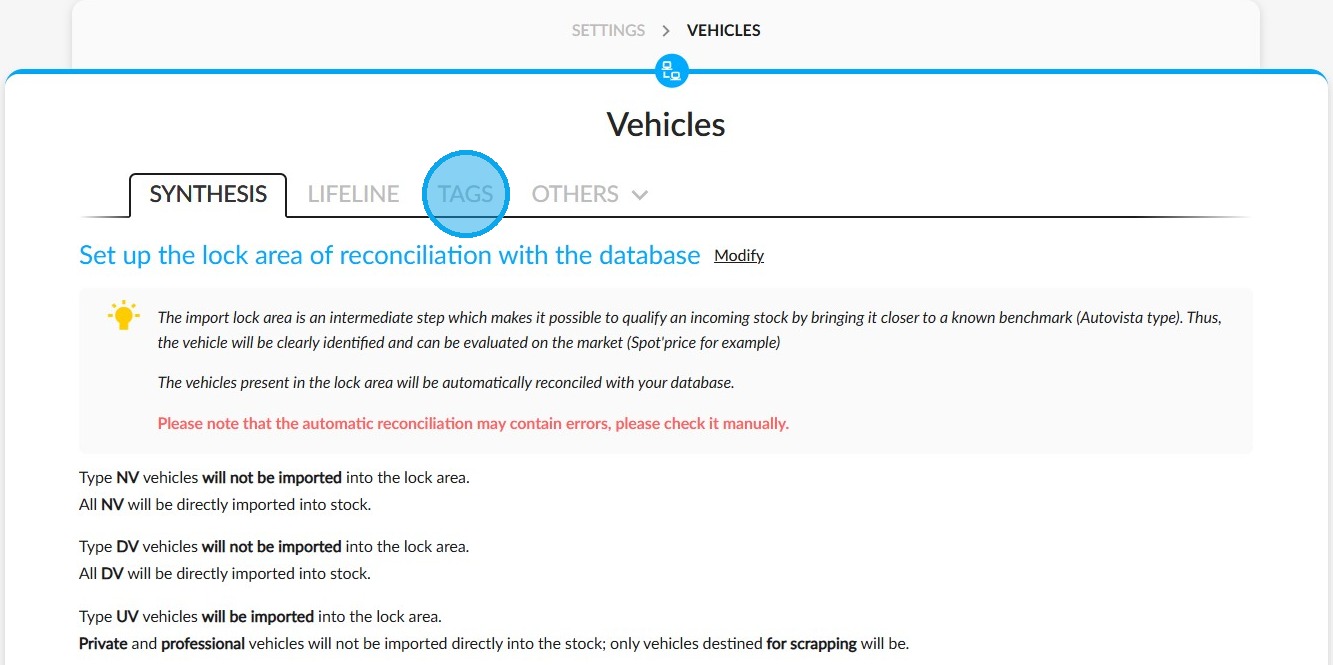
3. Click "Tags".
Add a tag
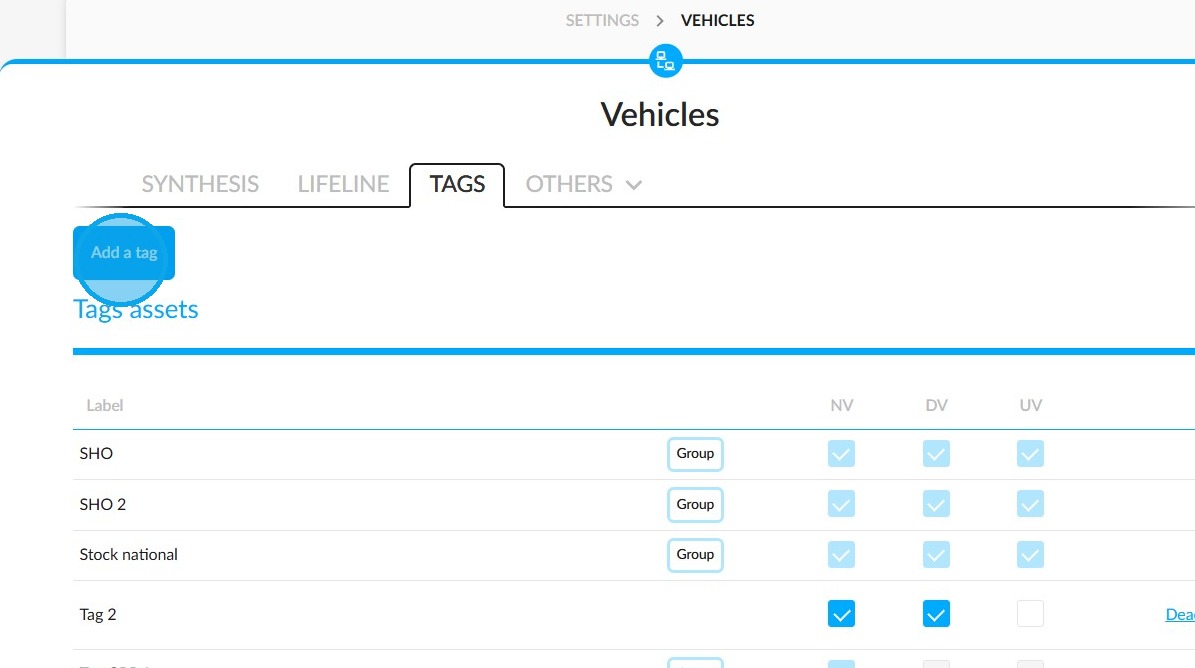
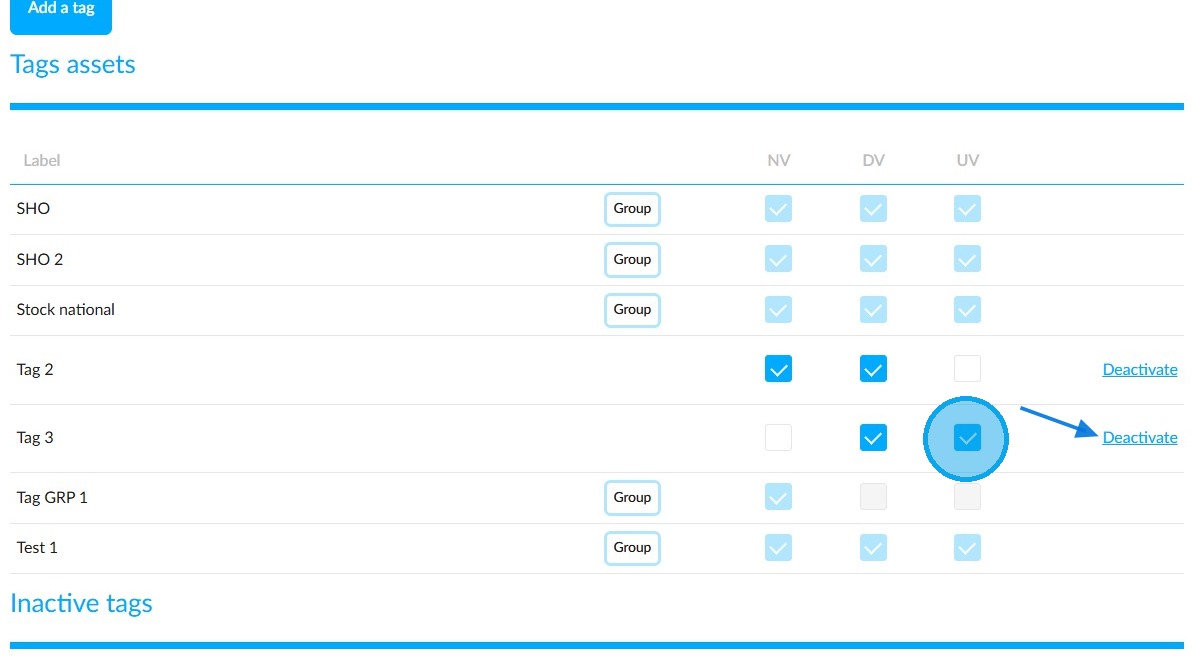
4. The page is divided into two sections. The active tags are at the top and the inactive ones are at the bottom. Those established from a Holding entity will be recognisable by the "Group" logo. Click on "Add a tag".
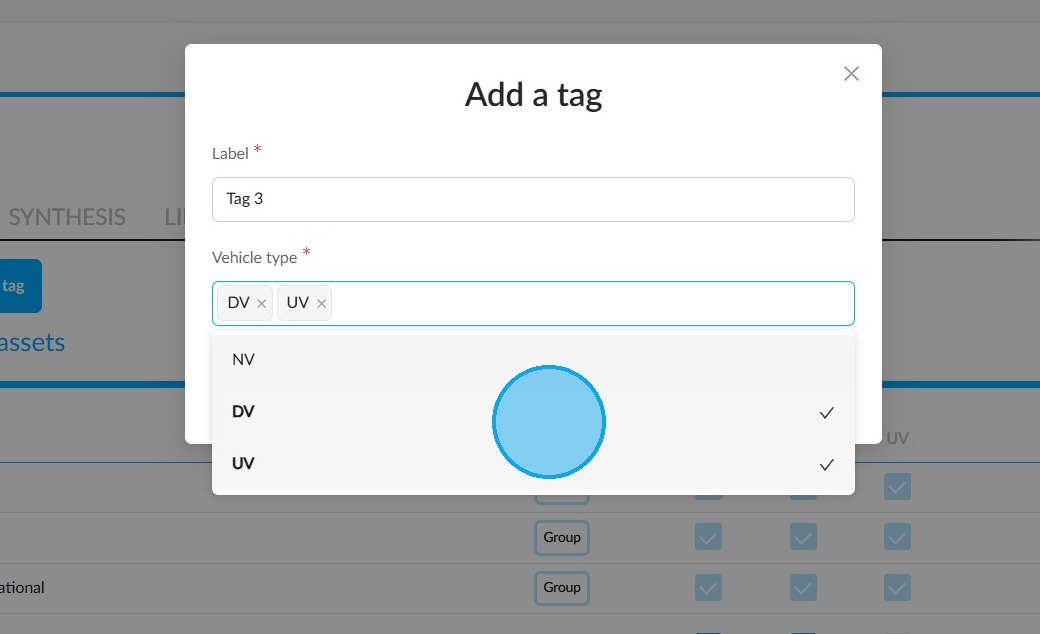
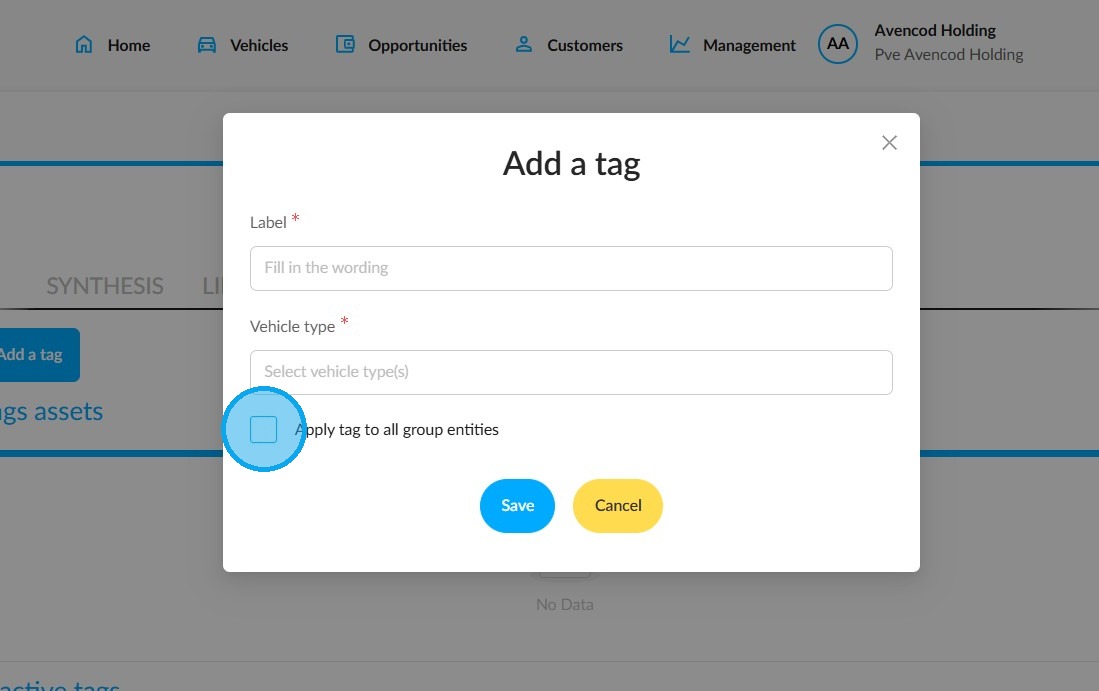
5. A pop-up will then open enabling you to write a label for the tag and to allocate it to one or several vehicle types.

6. Allocation is done via a drop-down menu:
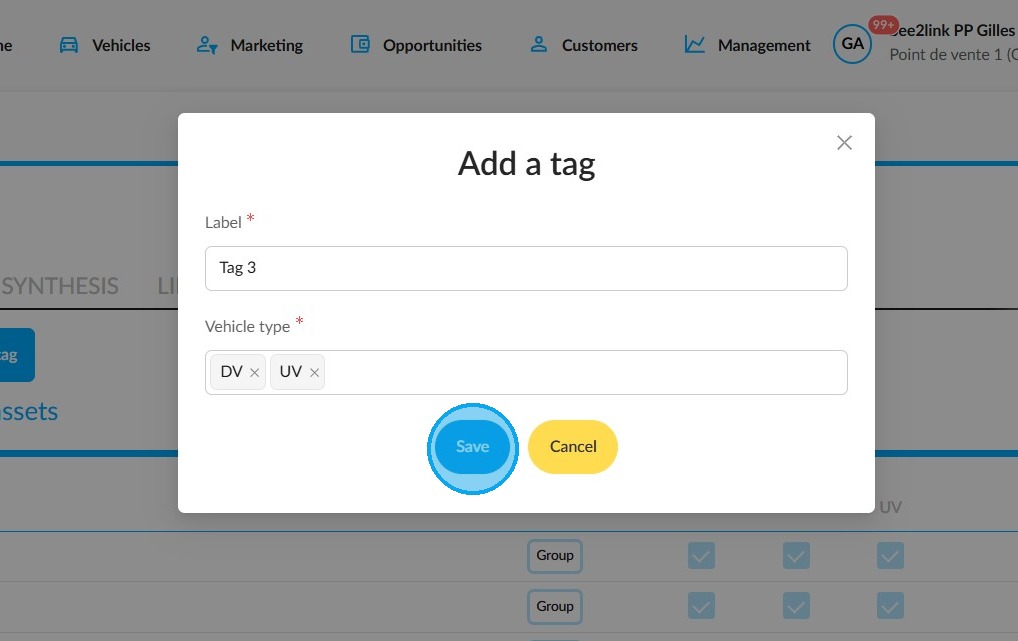
7. Finally, click "Save".
Organise tags
8. You can edit tags by changing the vehicle types they are associated with. To do that, simply check or uncheck the table boxes. These are displayed as columns. Each one corresponds to a vehicle type.
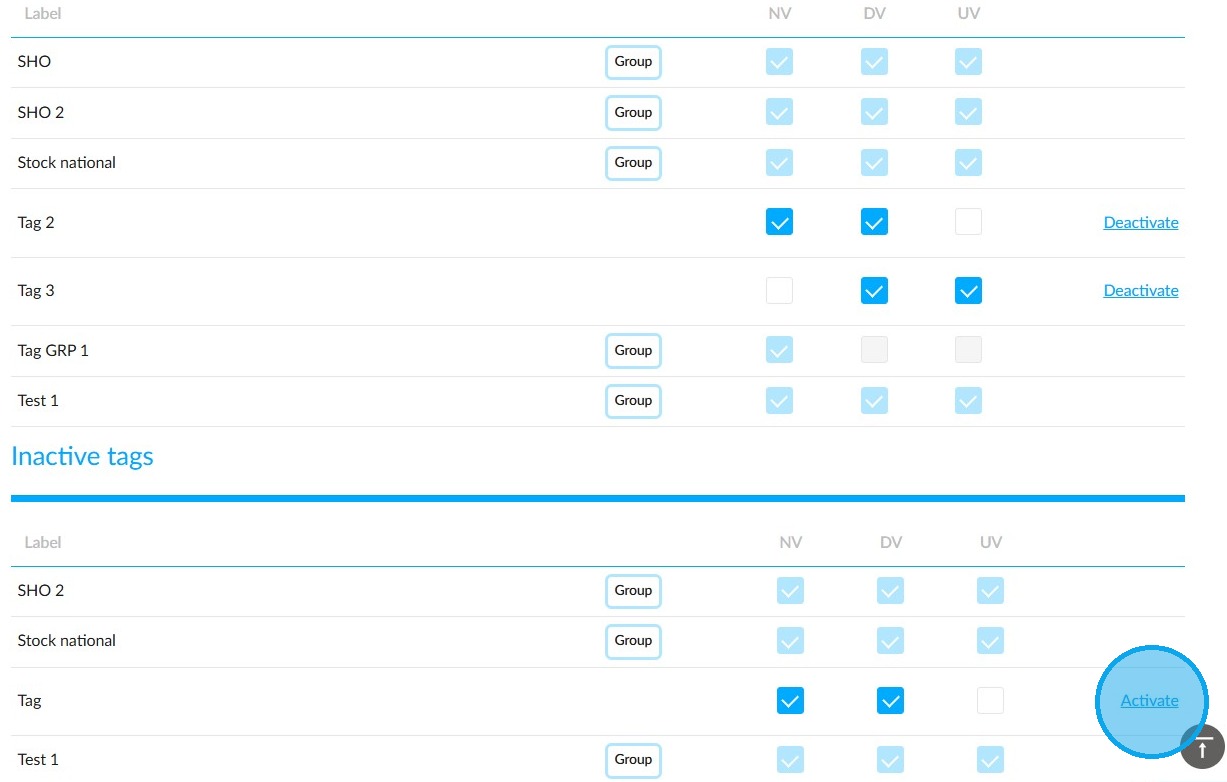
You can also deactivate a tag by clicking the 'Deactivate' button located to the right of the relevant line. This will move the tag to the bottom of the table, in the "Inactive tags" section.
9. In the same section, click on "Activate" to reuse a tag.
Create a tag for a group
10. A holding company administrator can share a tag with all the entities that form a group. Thay can select the "Apply tag to all group entities" option.
A group tag can only be modified on a holding entity.
Vehicle stock
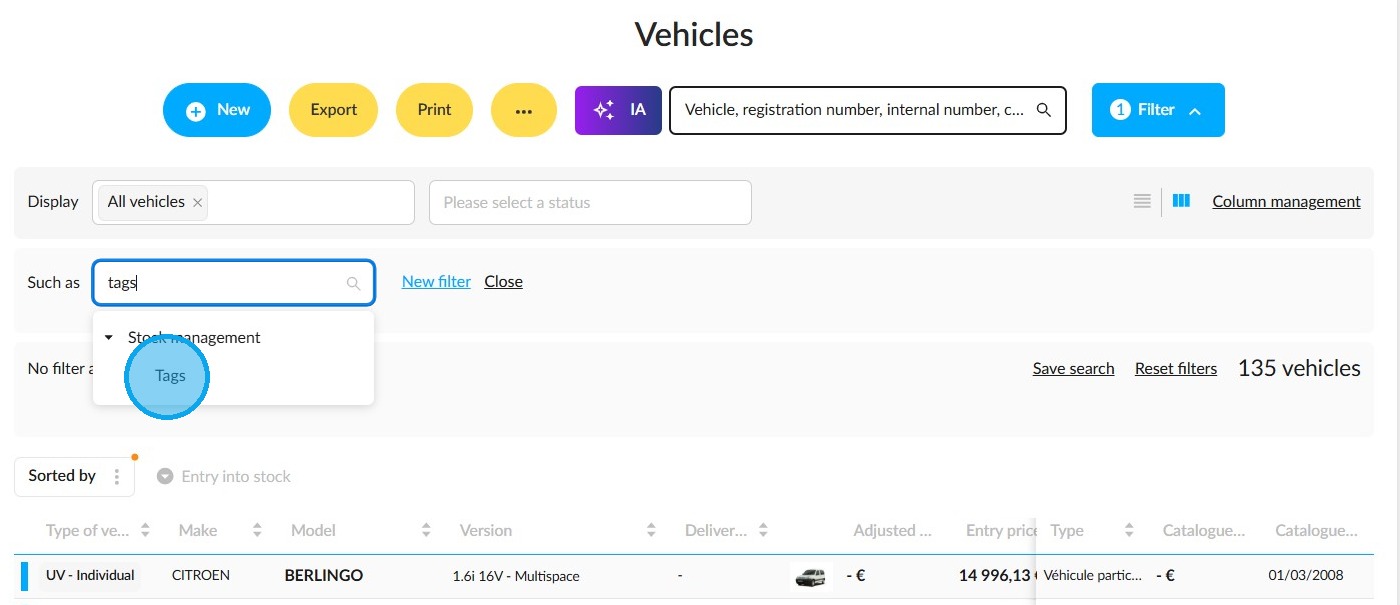
11. All tags that have been created, whether they are active or not, are accessible in the stock list. This enables you to quickly identify vehicles. You can either add a filter and go to the 'Stock management' section, or save time by typing 'tags' into the search bar.
Comments
0 comments
Article is closed for comments.