
When a used vehicle is traded in, the counter-valuation allows the information provided during the initial estimate, such as mileage, tyre condition and any defects, to be verified and compared with the original estimate.
Prerequisites:
-The vehicle must be a trade-in vehicle.
-The vehicle must have either the "Pre-entry" or "Physical entry" status.
-Only Managers, Salespeople, Sales Managers, After-Sales Staff, and Sales Administrators can counter-estimate a vehicle.
Identifying vehicles in stock
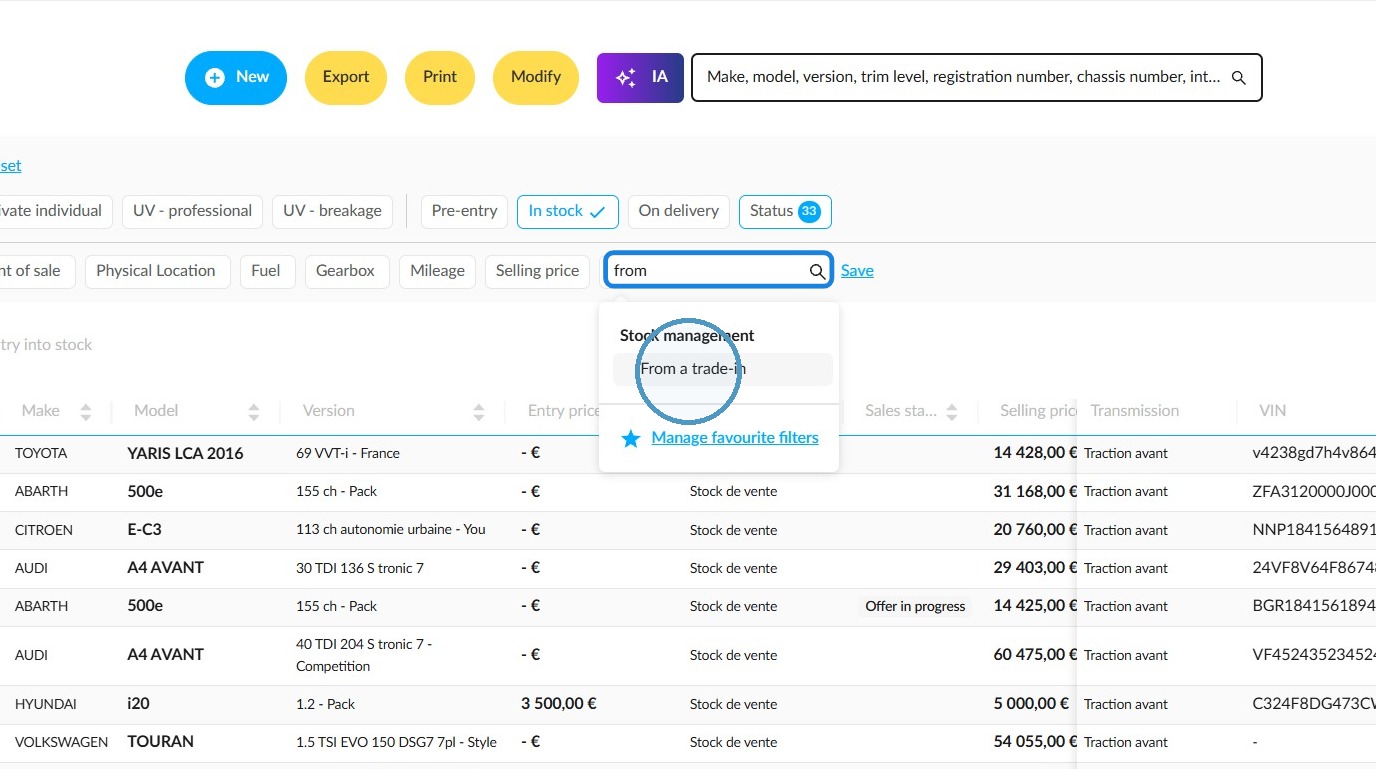
Use the “From a trade-in” filter to find relevant vehicles.
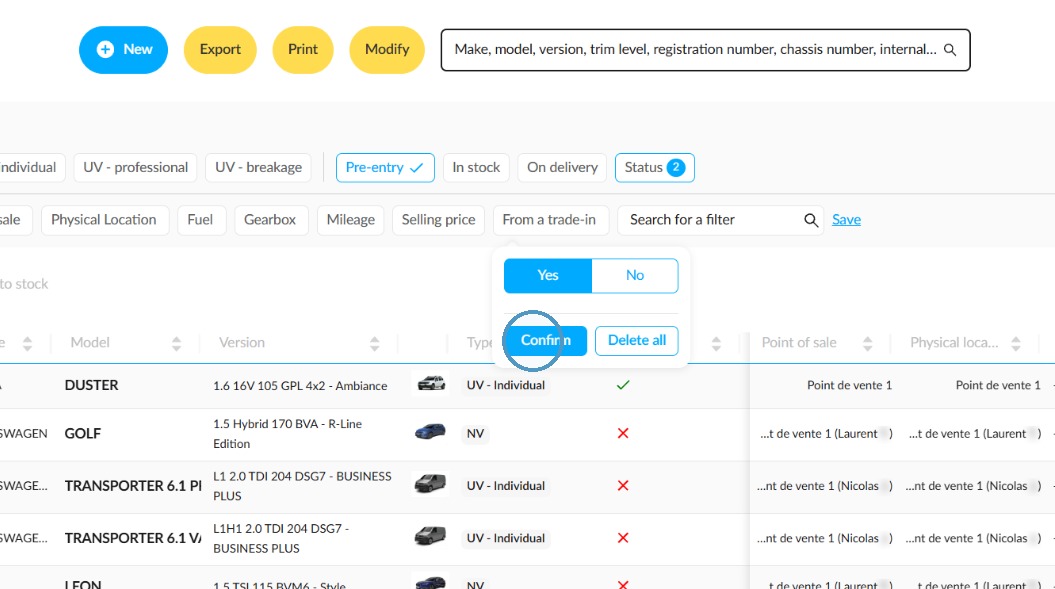
Select “Yes” and click “Confirm”.
Run the counter-estimate
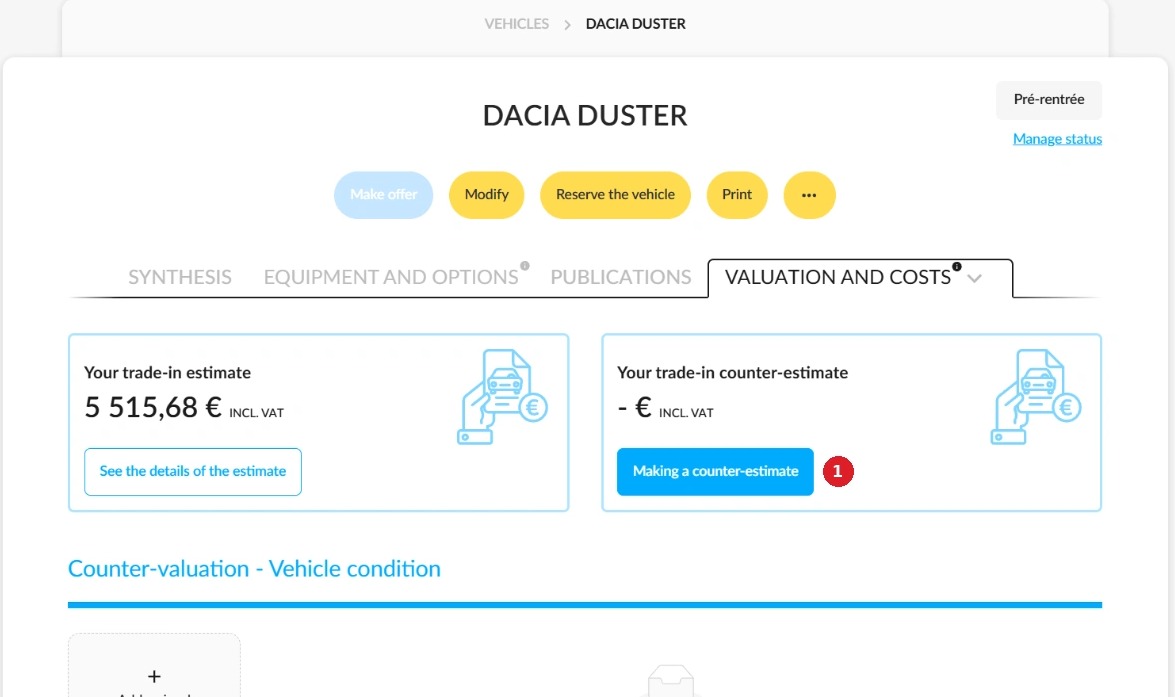
Open the record for the trade-in vehicle, then the “Valuation and costs” tab (under “Others”).
- Click on “Counter-estimate the vehicle” (1).
Step 1: Additional information
The fields are pre-filled with the estimate values, which are shown below each field (“Estimated: …”). “Scheduled arrival date” and - “Estimated mileage” are read-only.
- Enter the “Actual trade-in date” (2) and the “Actual mileage” (3). Both of these fields are compulsory.
- You can correct the registration number and chassis number. A value that has already been assigned to another vehicle in your stock will be rejected.
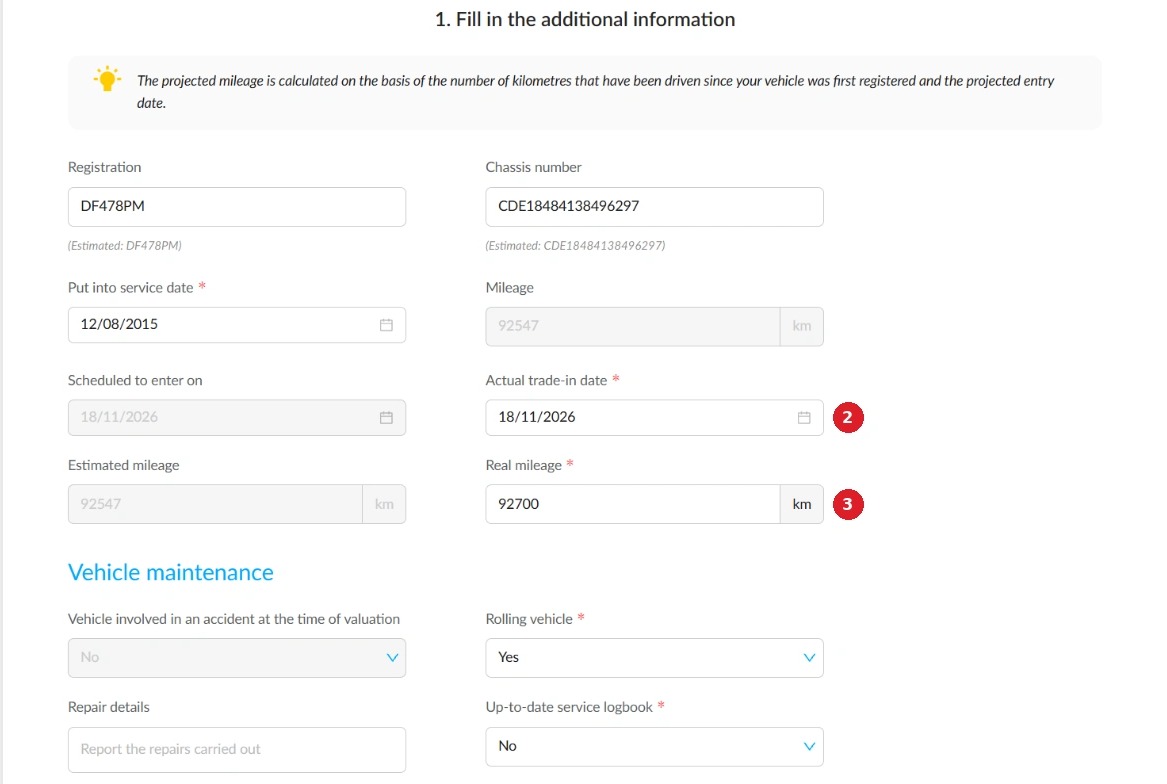
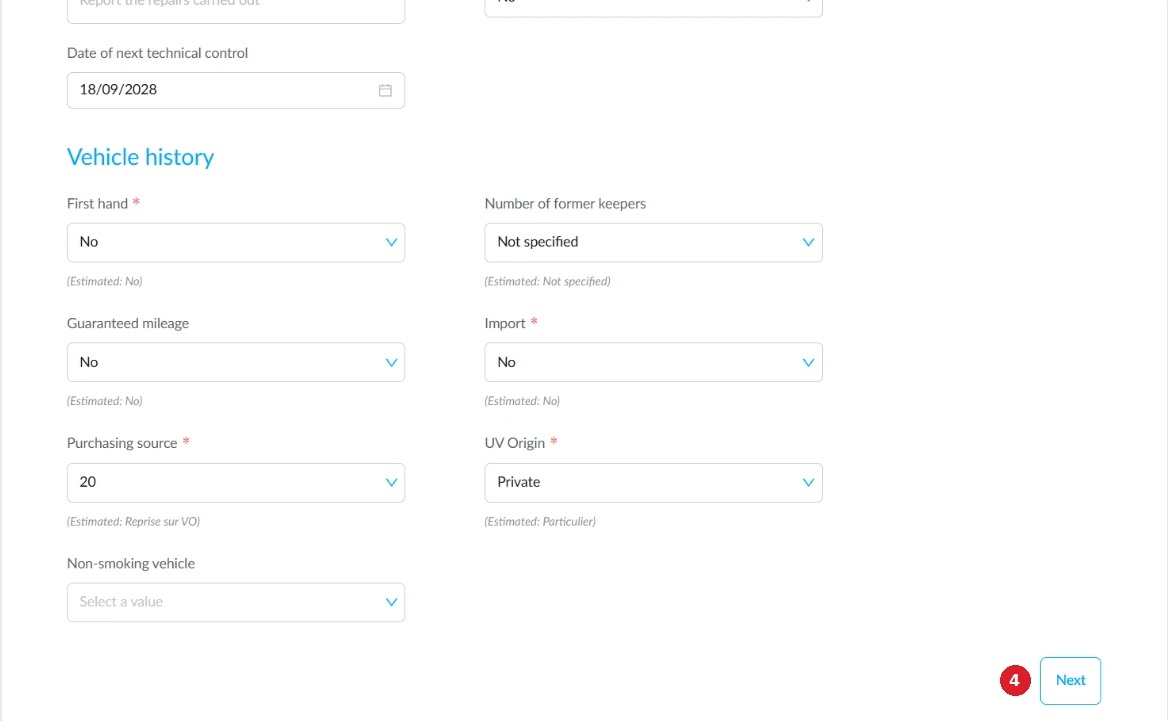
Check and, if needed, correct the “Vehicle maintenance” and “Vehicle history” sections.
- Click “Next” (4).
Step 2: Defects
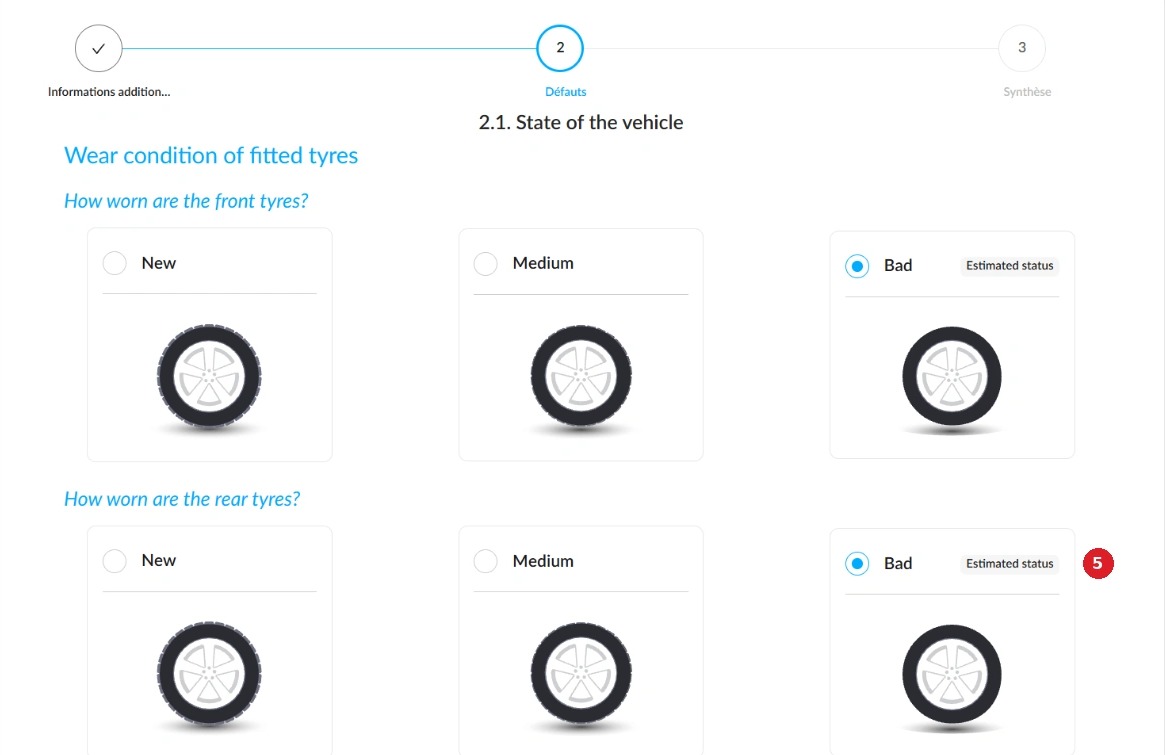
The tyre wear recorded during the estimate is preselected and marked “Estimated status”.
- Change it if needed (5). A tyre in poor condition adds reconditioning costs.
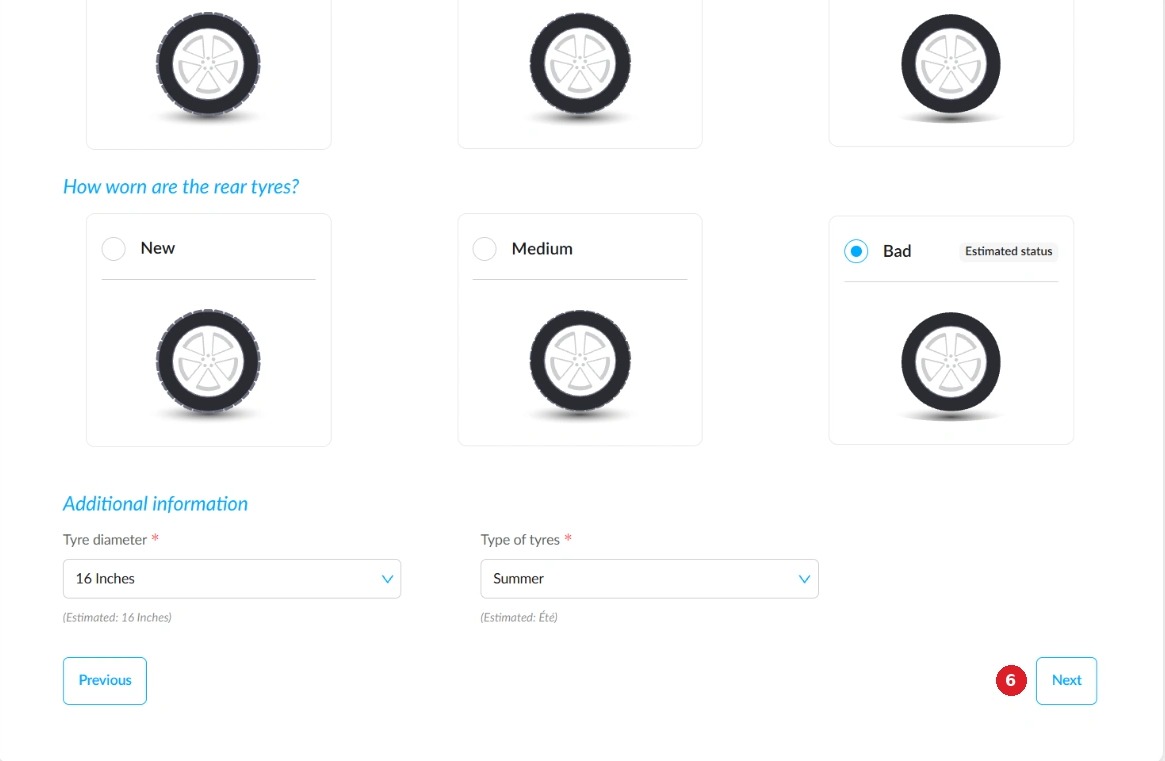
Check the “Tyre diameter” and “Tyre type”.
- Click “Next” (6).
For an electric vehicle, check the “Battery condition”.
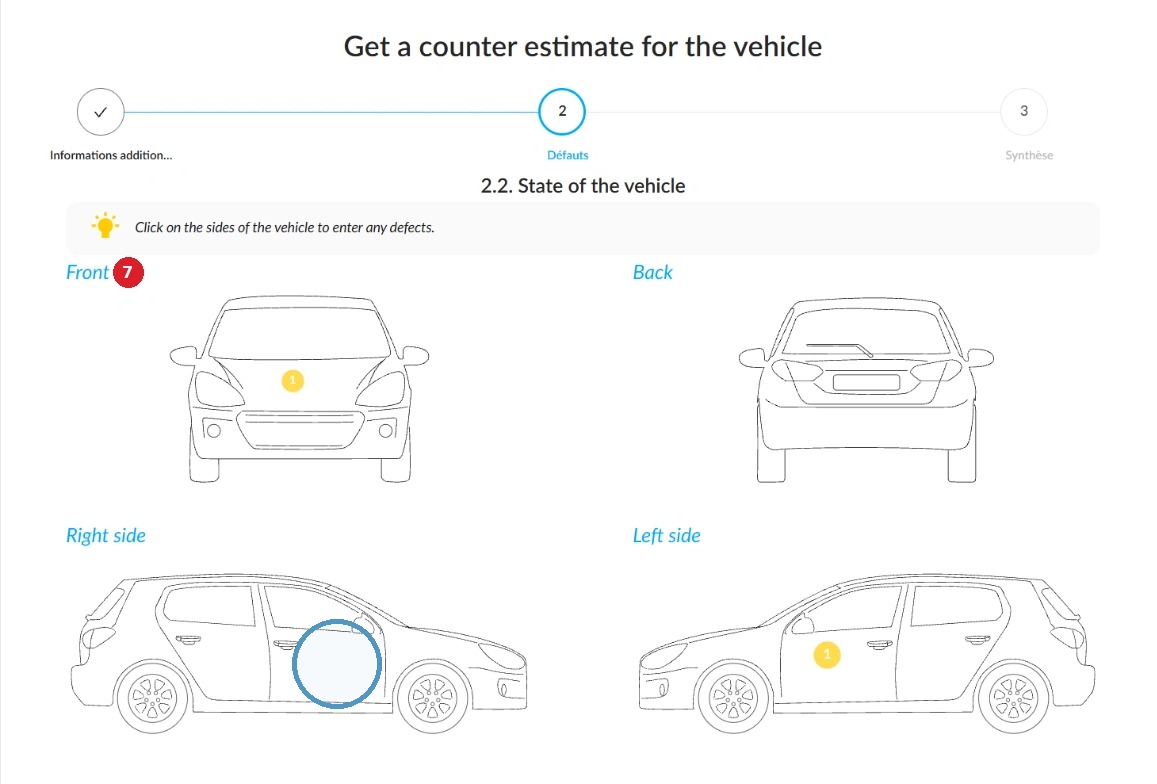
- Click a side of the vehicle (7) to check or add a defect.
Any defects identified during the estimate are noted and marked with a dot on the relevant parts of the vehicle.
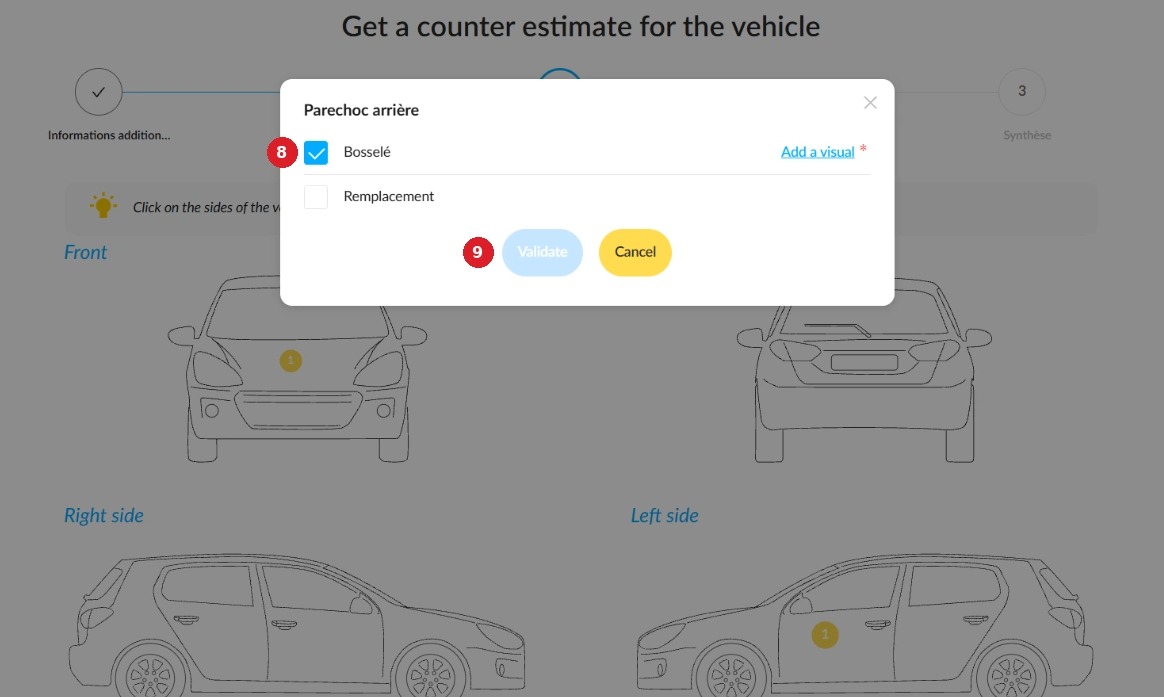
Tick the defect found (8).
- Click “Validate” (9).
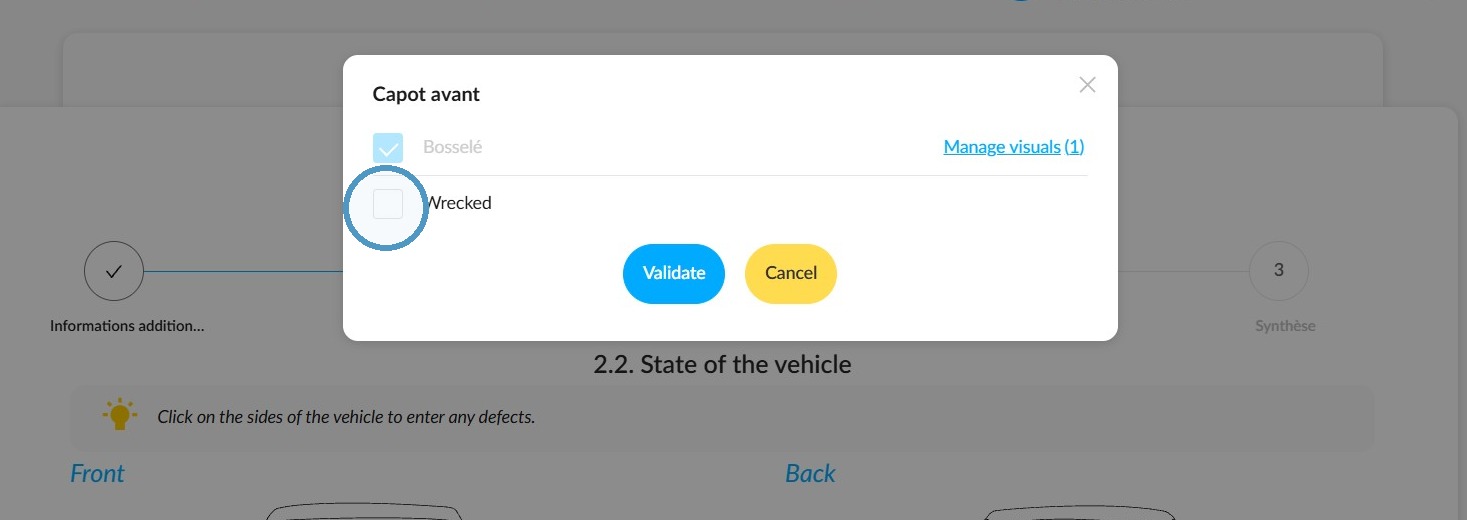
A defect recorded during the estimate is greyed out: you cannot untick it in this window. If you tick another condition, it is added to the estimated defect.
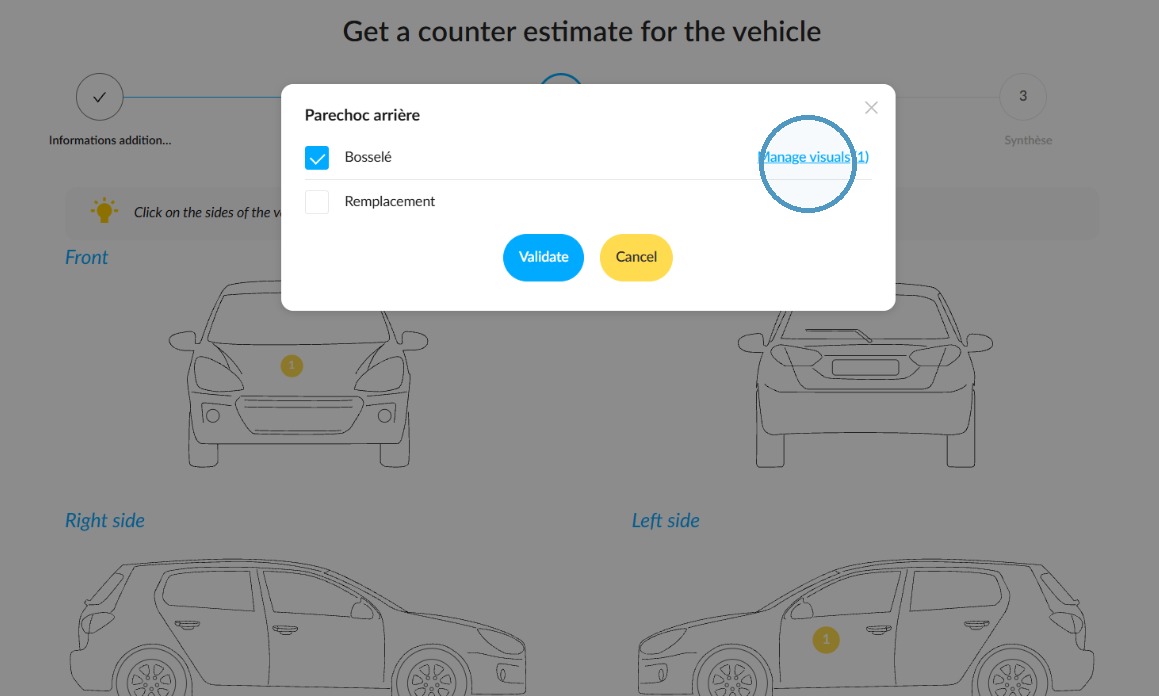
Before validation, you can attach a photo using “Add a visual”. Once the photo is added, the link changes to “Manage visuals”.
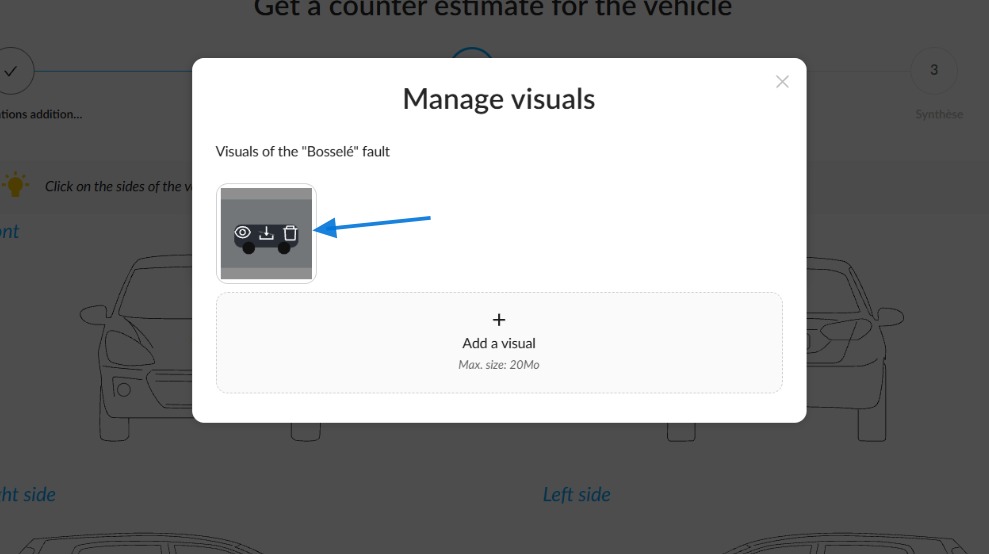
If you click it, the “Manage visuals” window opens. Hover over a photo to view, download or delete it.
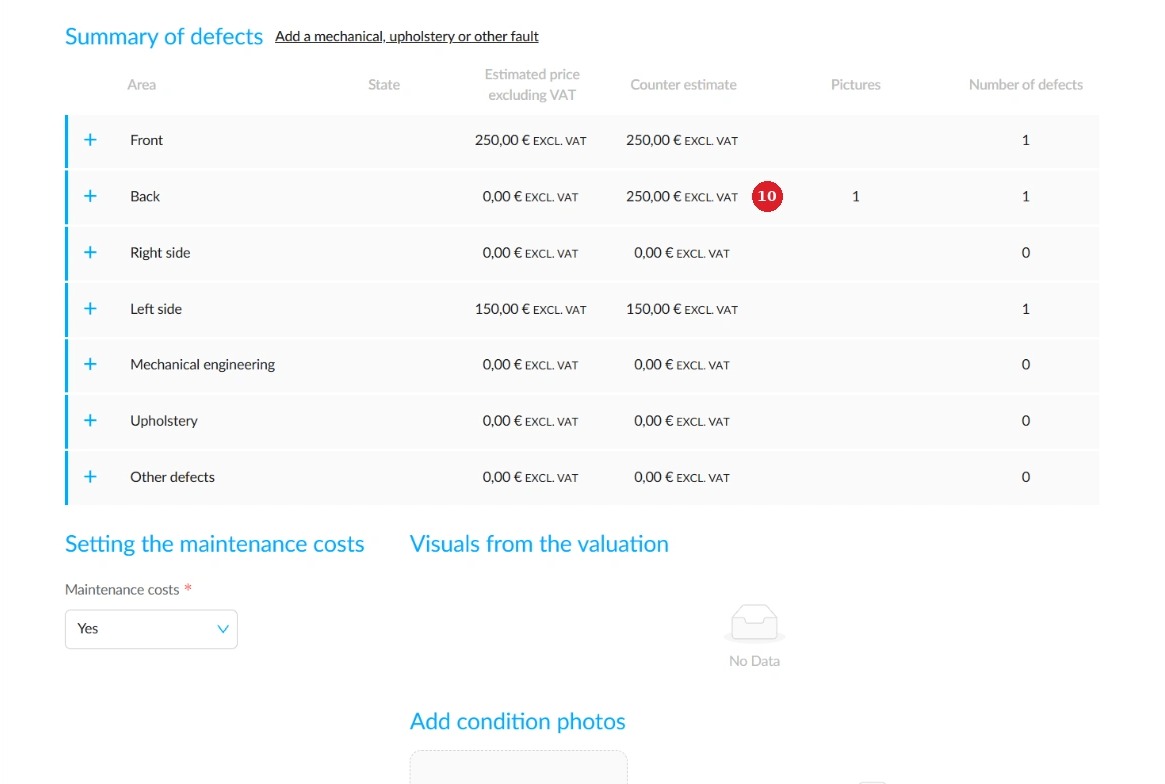
The “Summary of defects” compares the estimated price and the counter-estimated amount by area (10).
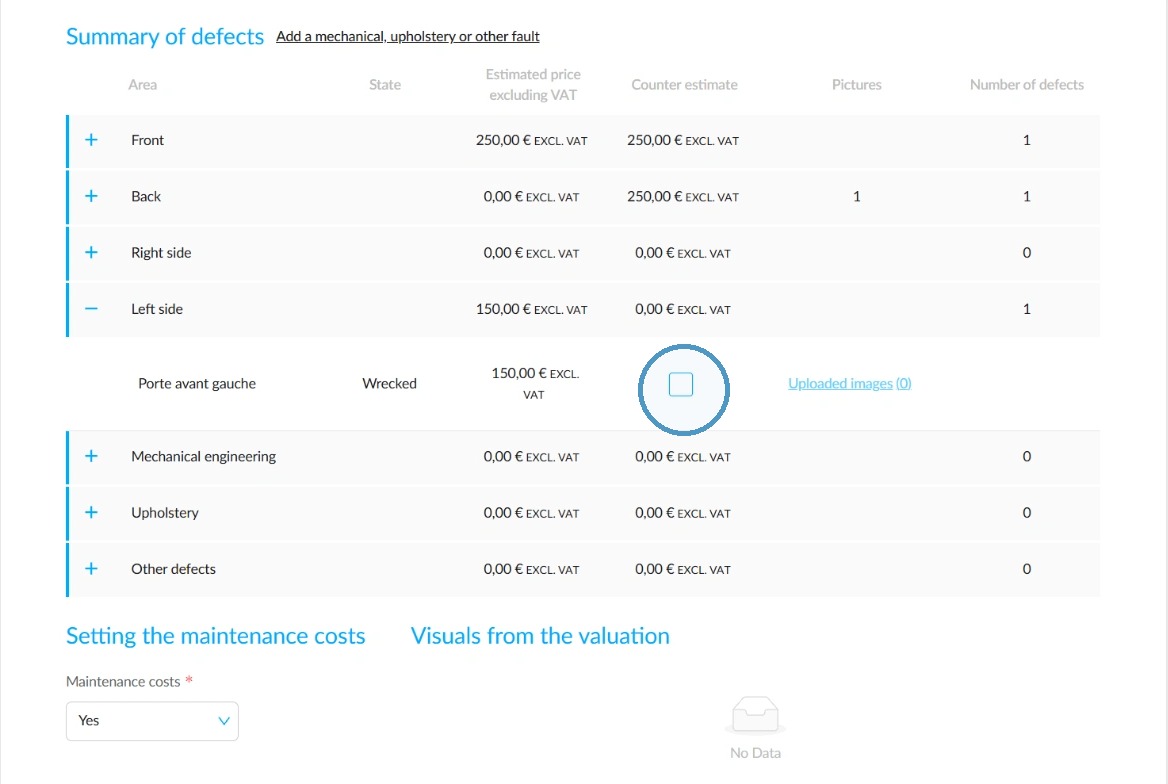
To remove a defect recorded during the estimate, untick it in the “Counter-estimate” column: its amount drops to 0.
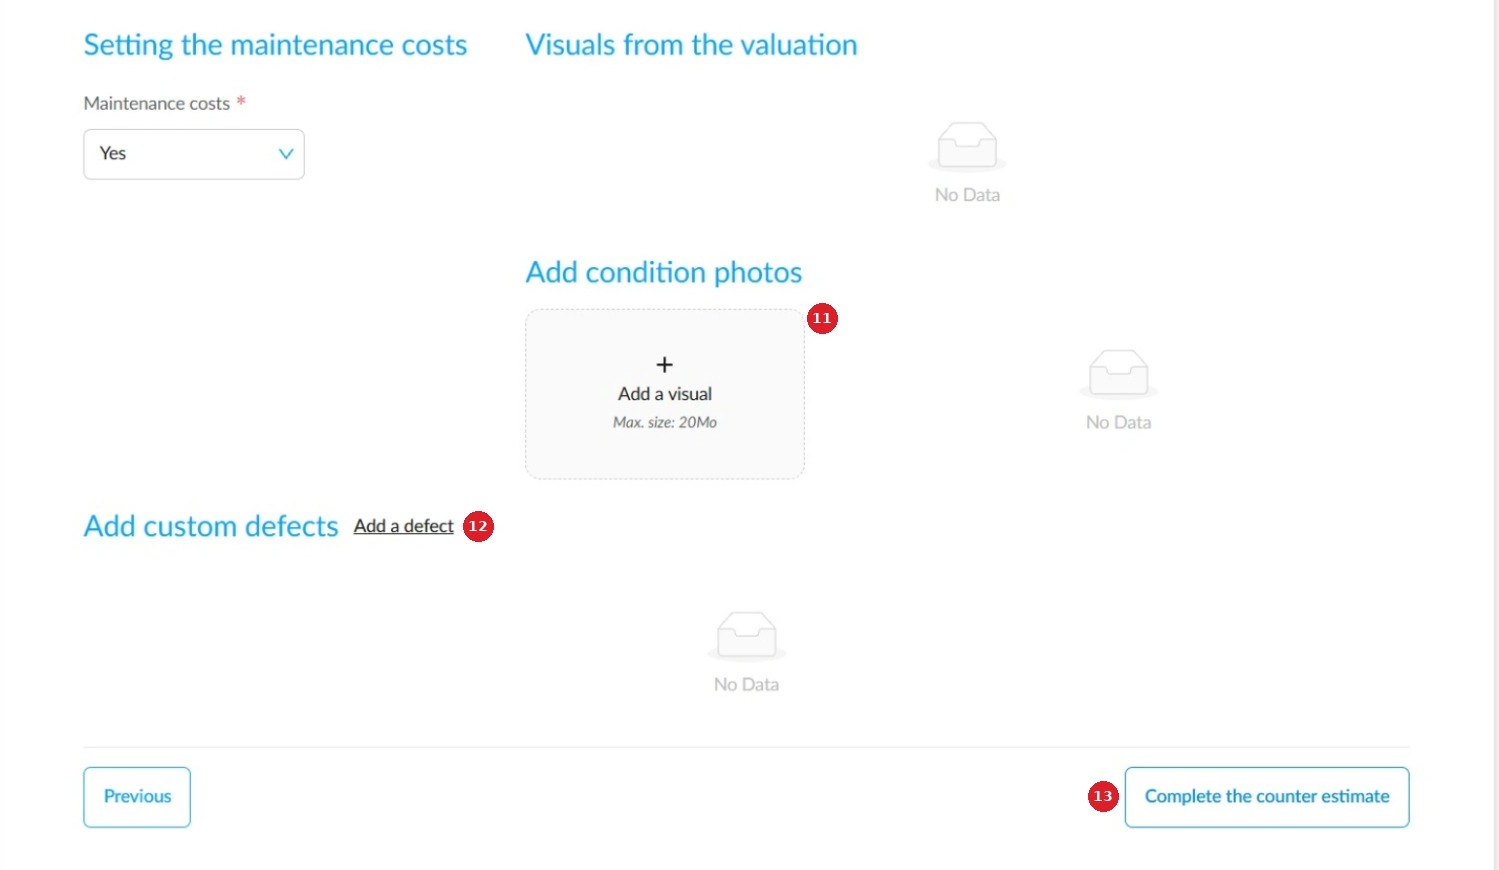
If needed, add walkaround photos of the vehicle (11) or custom defects (12). Photos are optional.
- Click “Complete the counter-estimate” (13).
Step 3: Synthesis
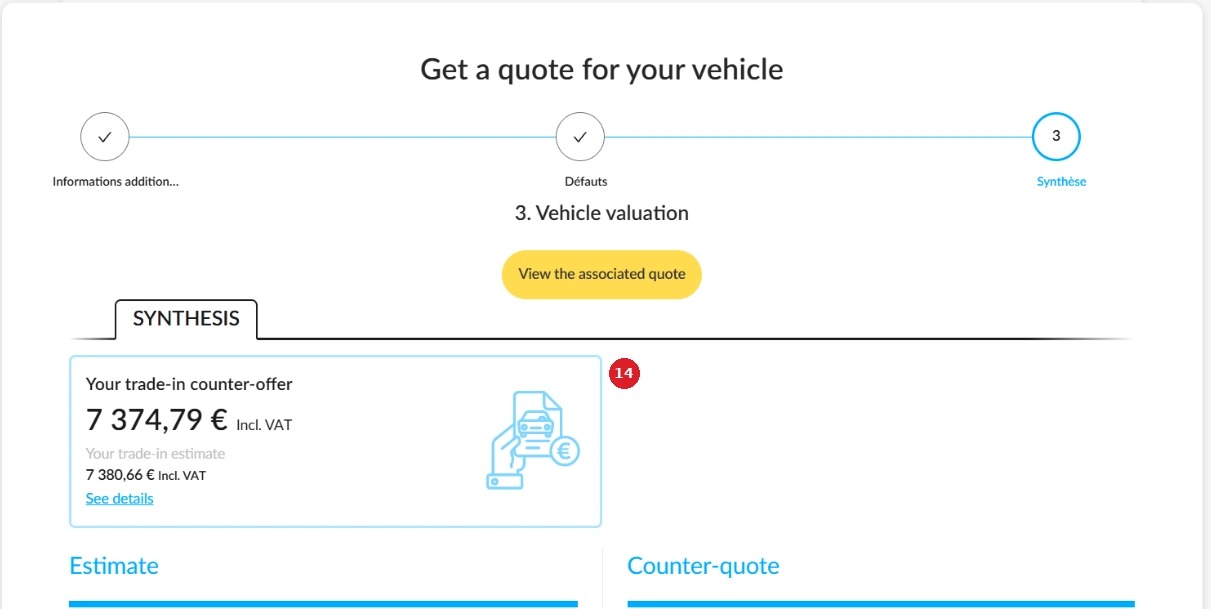
The counter-estimate is saved and the summary is displayed. It shows the counter-estimated trade-in price and the original trade-in estimate (14).
Click “View the associated estimate” to open the original estimate.
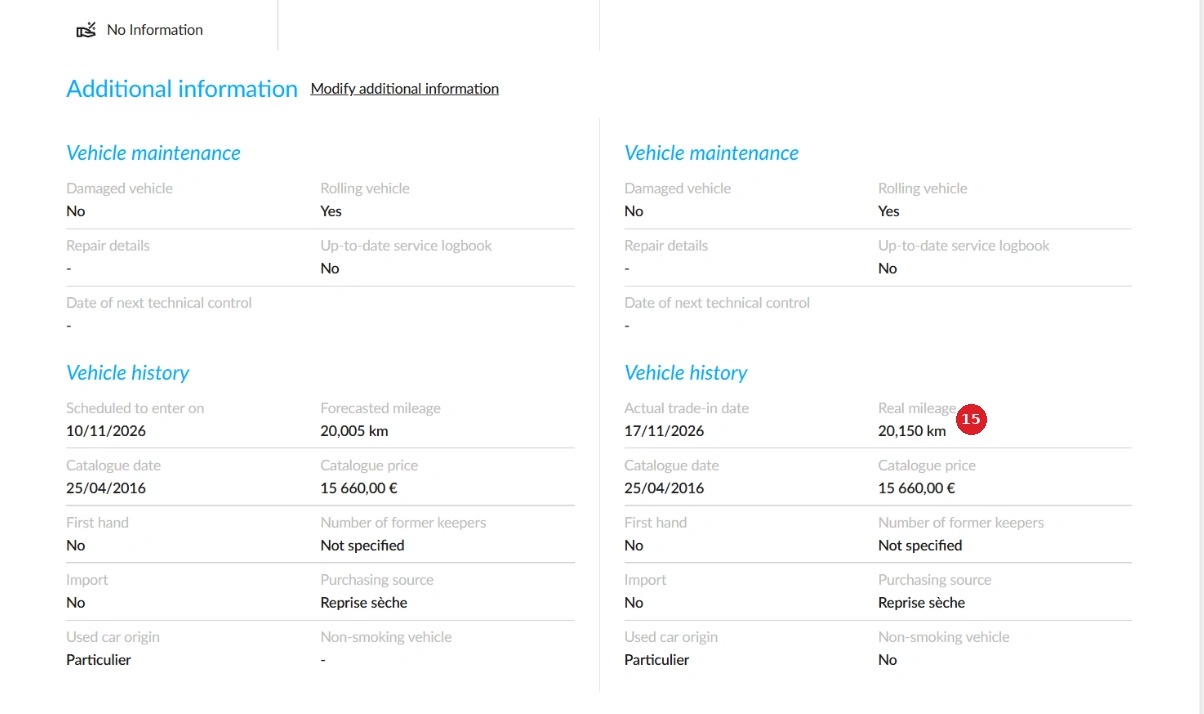
The estimate (left) and the counter-estimate (right) are displayed side by side. The counter-estimate shows the actual trade-in date and actual mileage (15).
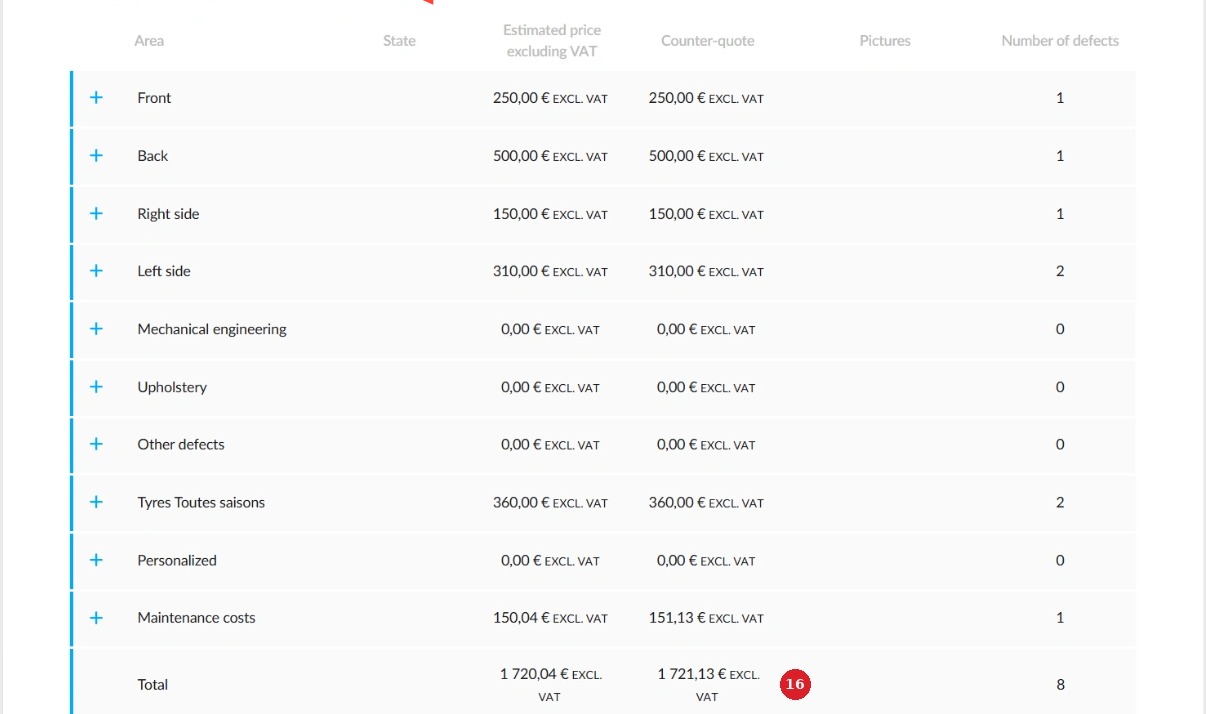
The “Vehicle condition” table compares repair costs by area, as well as the total (16). Clicking the “Edit condition” button takes you back to where you can edit the vehicle’s tyres and defects.
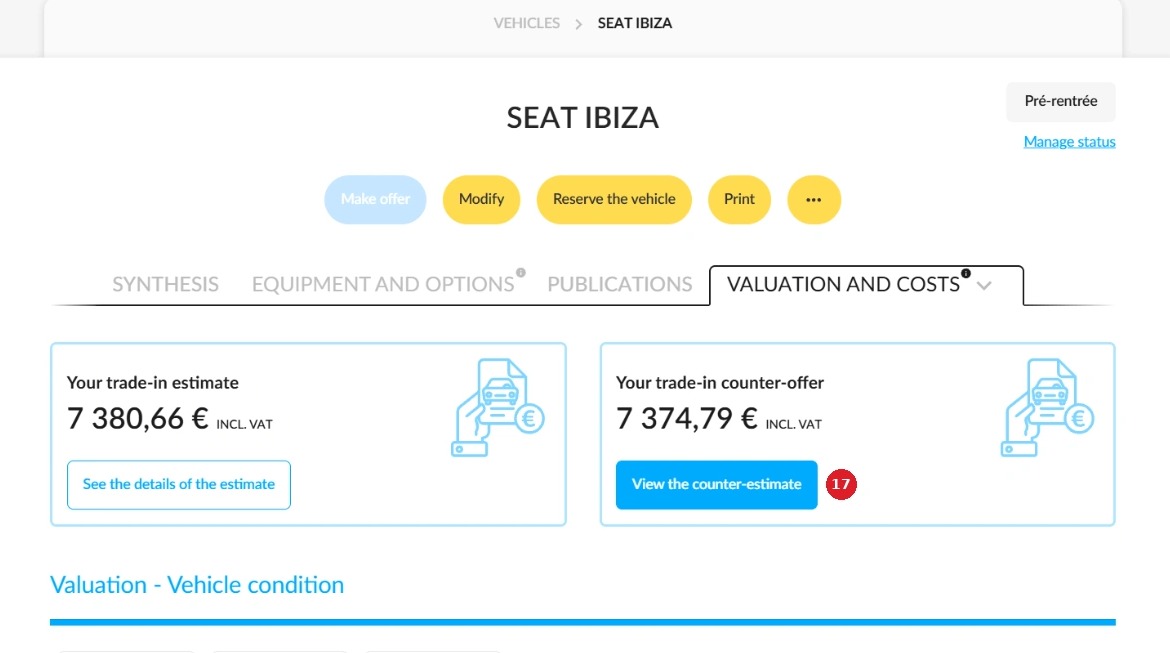
On the vehicle record, the “Valuation and costs” tab displays the trade-in estimate and counter-estimate.
- Click “View the counter-estimate” (17) to open it.
The counter-estimate does not change the vehicle’s destination.
Comments
0 comments
Article is closed for comments.